– You can make a version of edible glitter at home using colored sugar or gelatin — but it won’t shimmer the way real luster dust does
– True edible glitter gets its shimmer from mica-based pigments, which you can’t replicate in a home kitchen
– Homemade versions work fine for texture and sparkle; they fall short for that deep metallic glow
– Store-bought luster dust is cheaper per use than most DIY methods, and lasts significantly longer
The Short Answer
Yes, you can make edible glitter at home. It’s not complicated. But there’s a catch — what you’ll end up with isn’t really the same thing as luster dust, and understanding why helps you decide which one’s actually worth your time.
Here’s the deal: “edible glitter” is a catch-all term that covers everything from colored sugar crystals to mica-based pearlescent powder. The DIY stuff lands in the first category. Real luster dust is the second. They behave completely differently and they look completely different — especially in drinks, where the shimmer is the whole point.
How Edible Glitter Is Actually Made
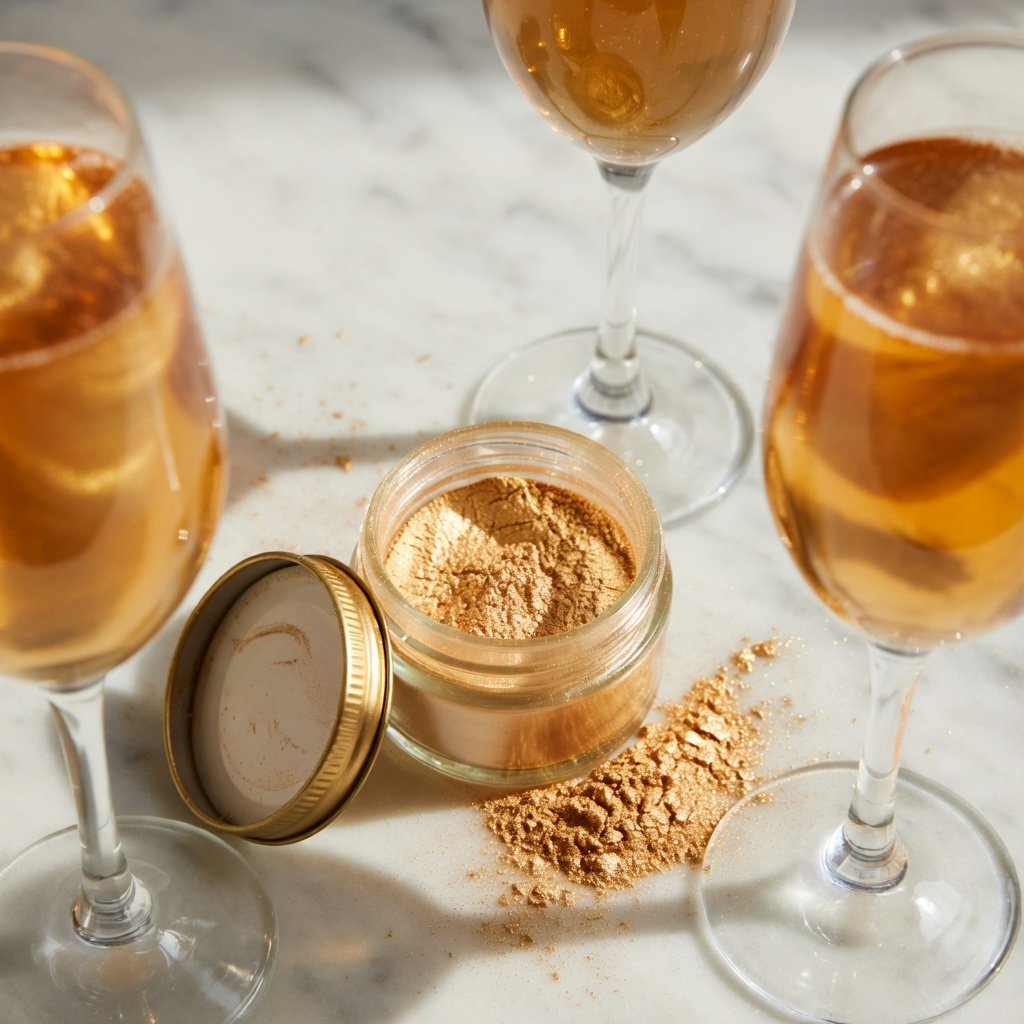
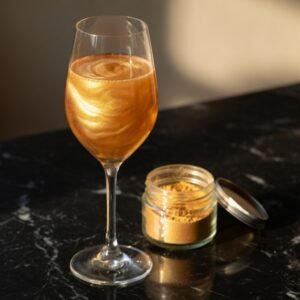
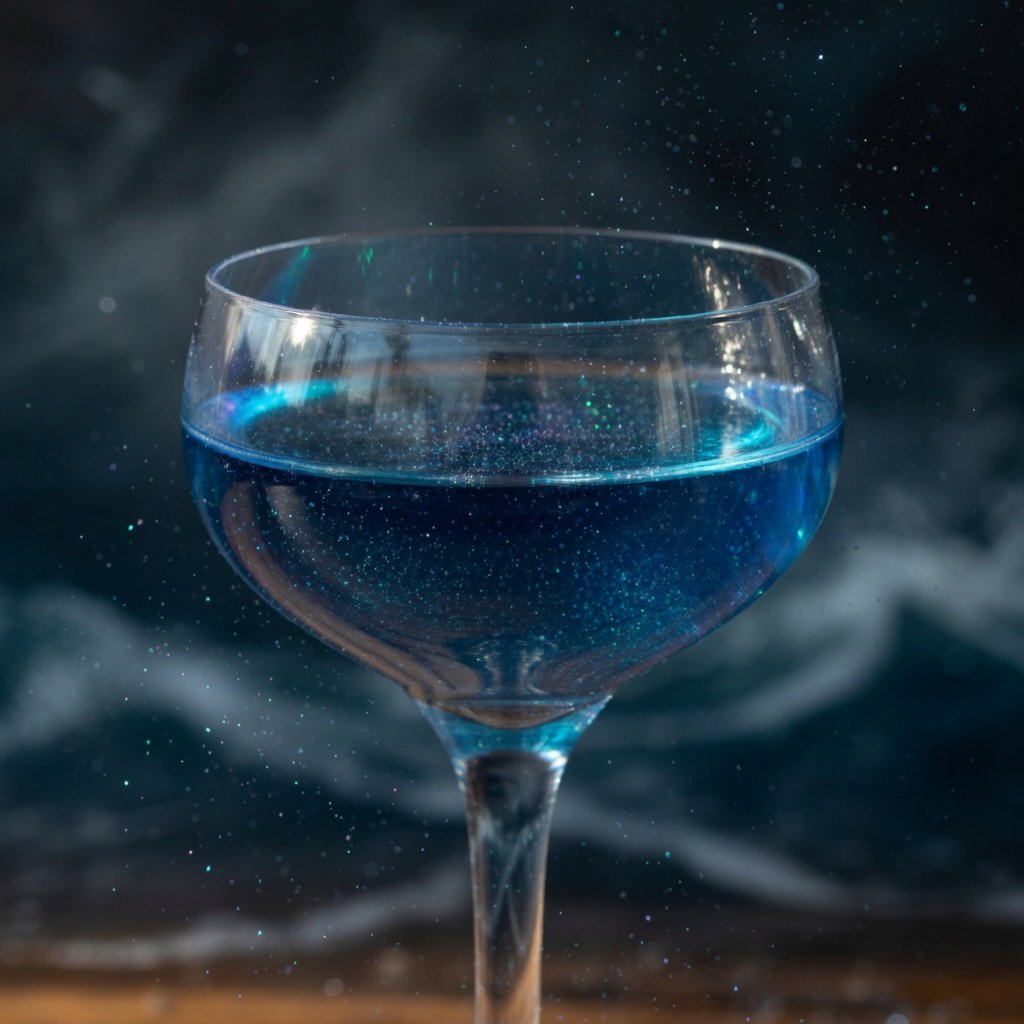
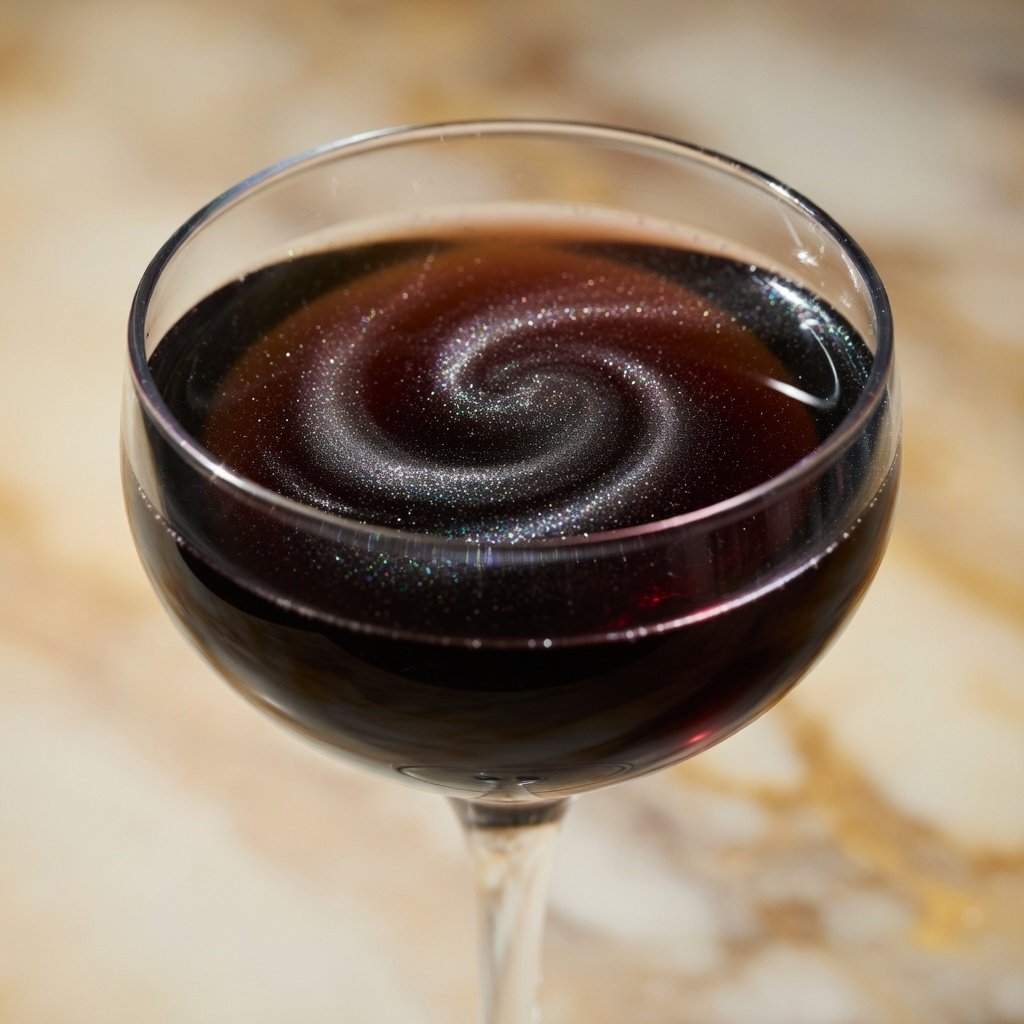
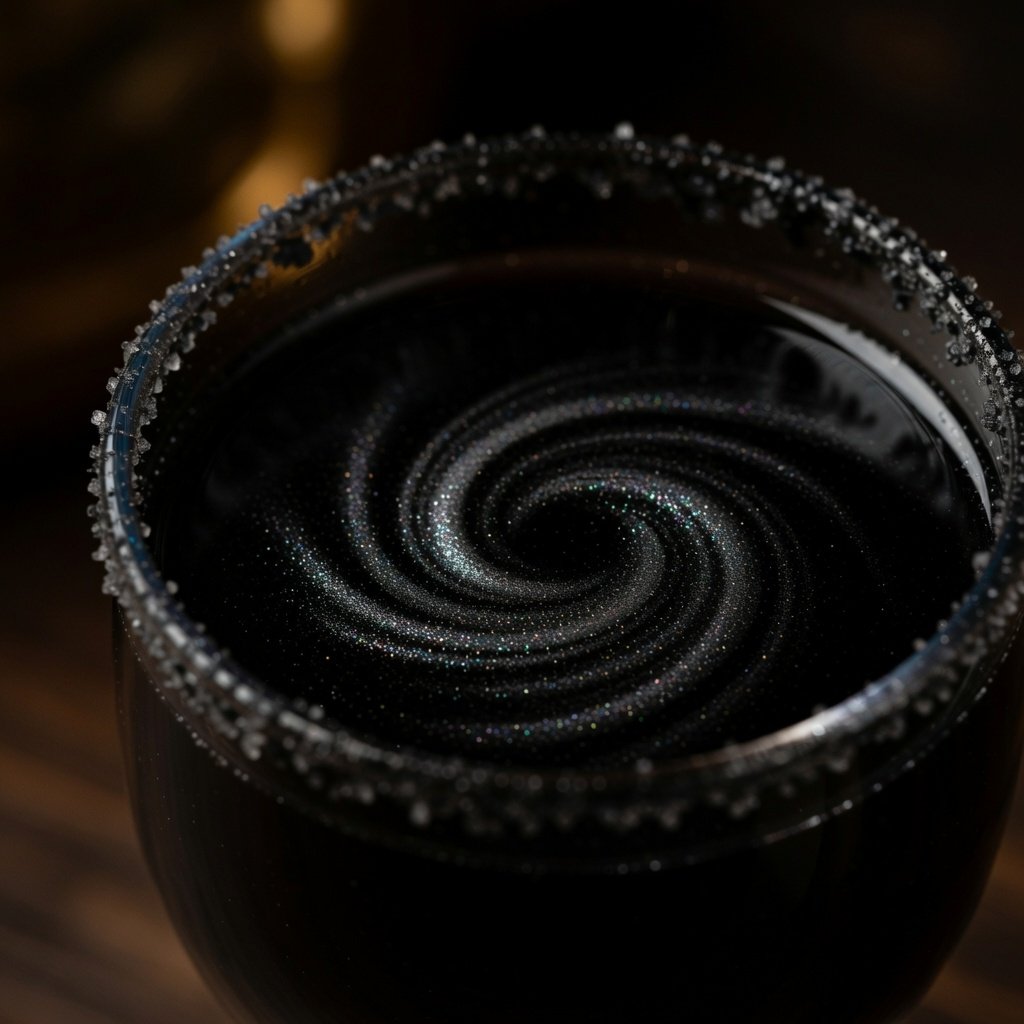
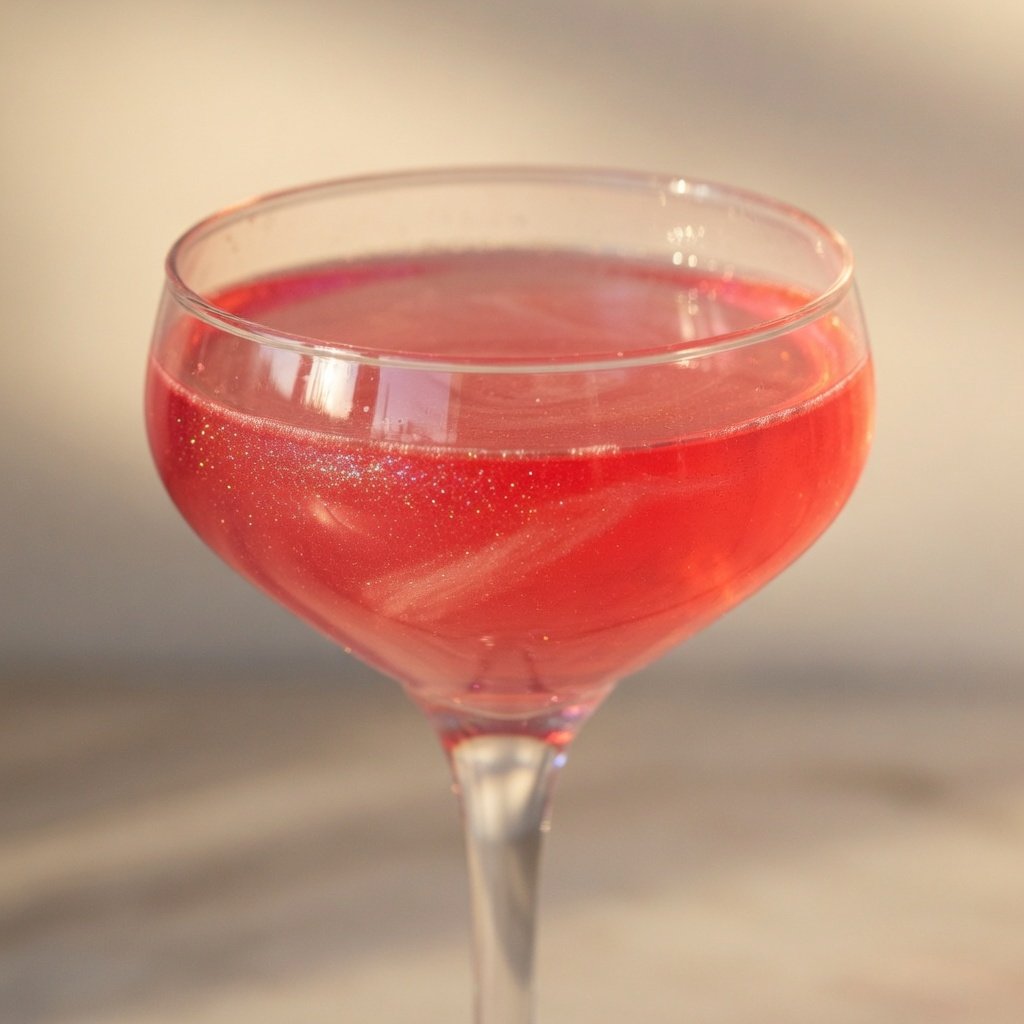
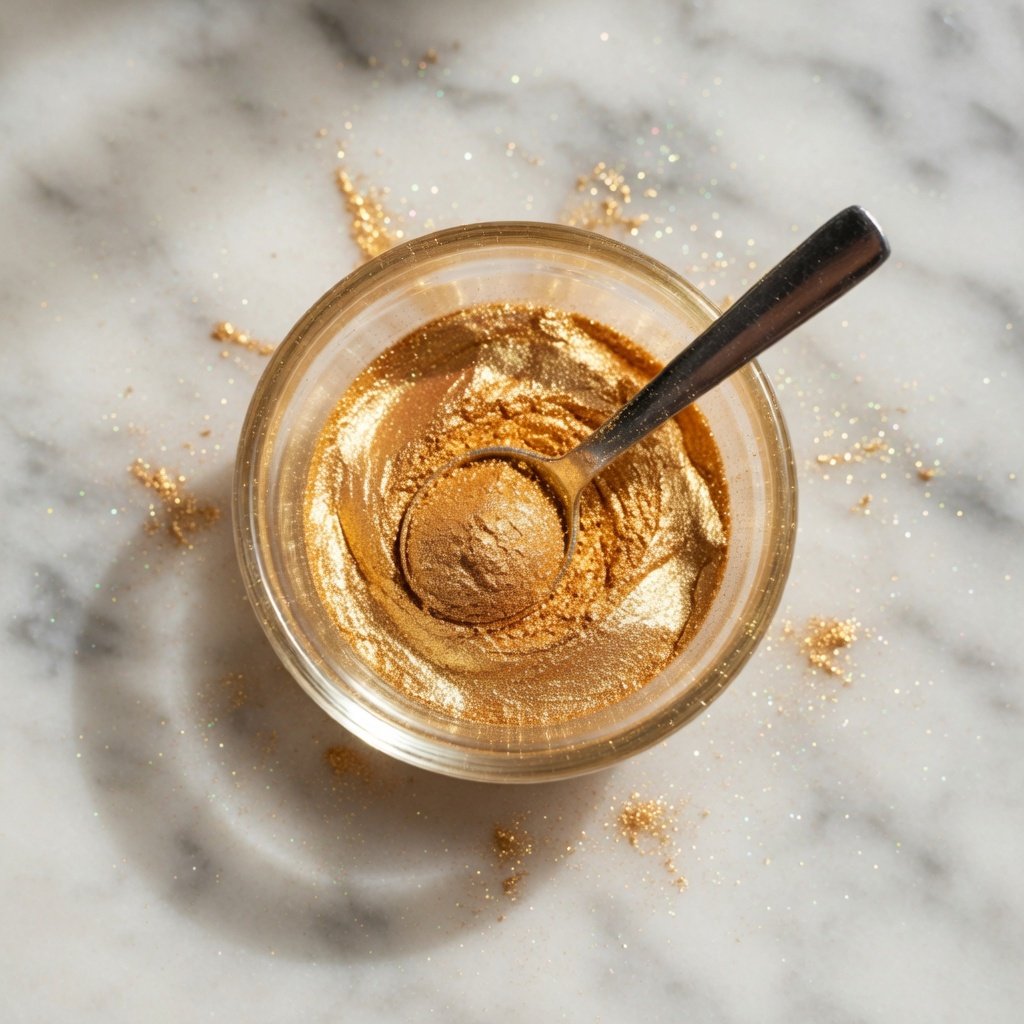
The shimmer in proper luster dust comes from mica — a naturally occurring mineral that’s been used in food for decades. The mica gets ground into extremely fine particles, then coated with food-grade pigments to produce specific colors. Those thin, flat particles are what catch and reflect light. Stack a few thousand of them in a glass of champagne and you get that rolling, living shimmer that follows the bubbles up.
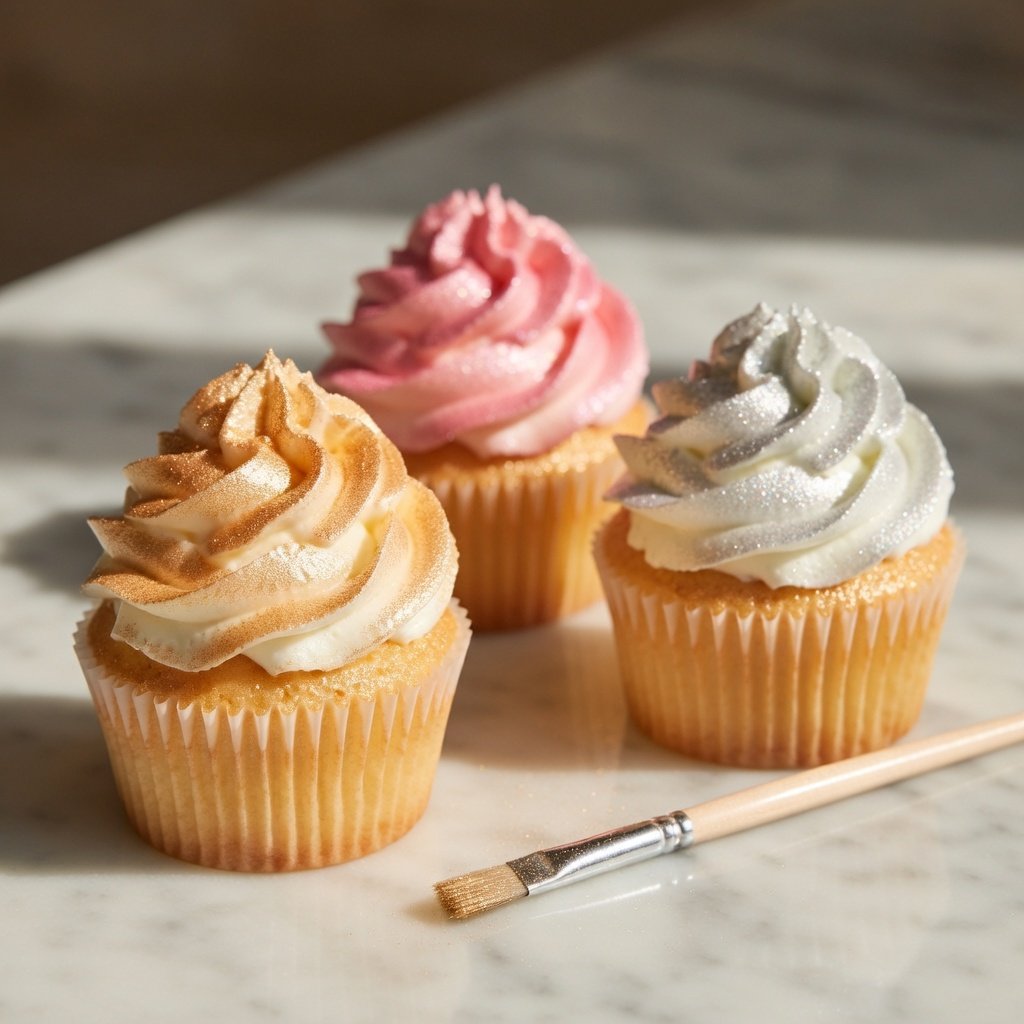
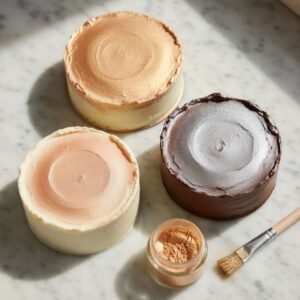
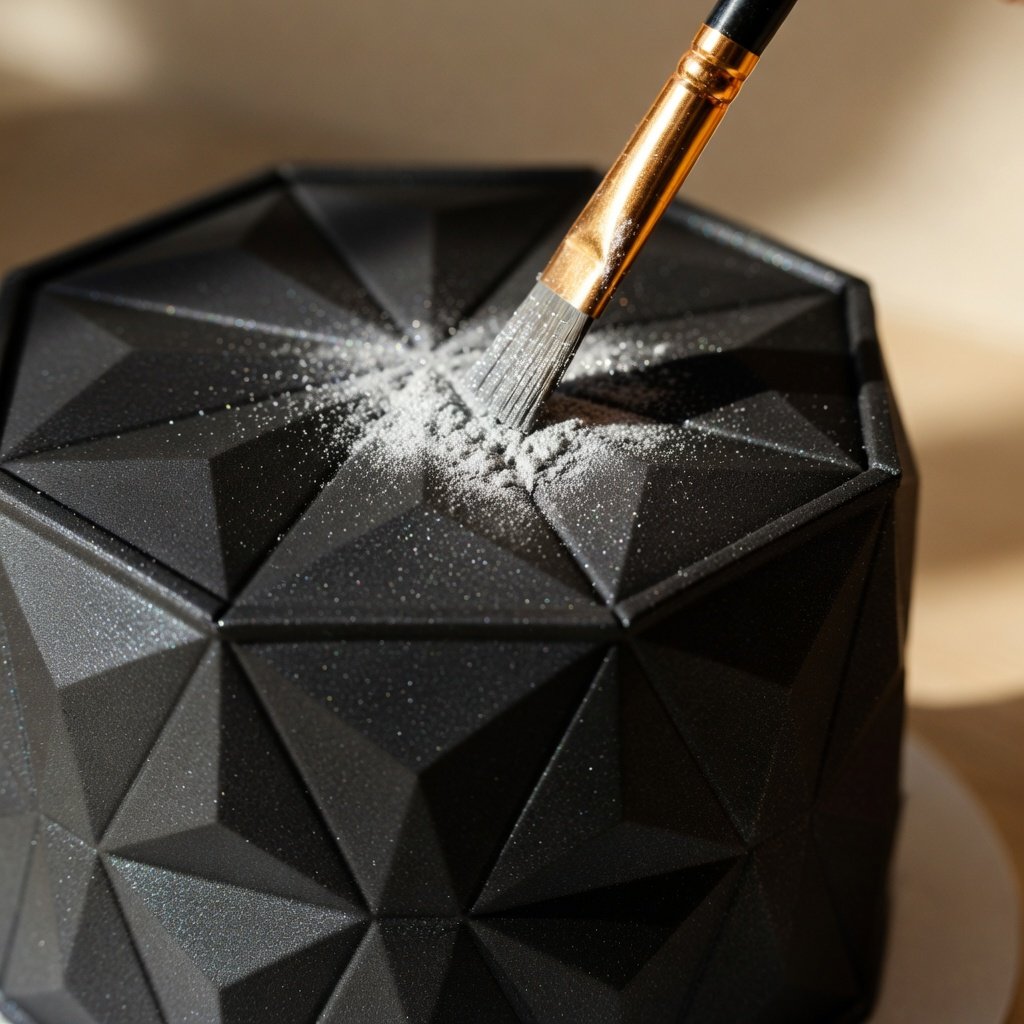
You genuinely cannot do this at home. Mica isn’t something you pick up at the grocery store, and getting the particle size right requires equipment that isn’t sitting in anyone’s kitchen. Our Gold Luster Dust uses German mica pigments specifically because the particle consistency is better — tighter size range, richer reflectivity, more even dispersion in liquid.
What you can make at home is sparkle sugar or shimmer powder using ingredients like granulated sugar, pearl dust bases, or gelatin. These have their uses. They just aren’t the same thing.
Gelatin-Based Edible Glitter
This is probably the most popular DIY method, and it actually works pretty well for cake decorating.
What you need:
- 1 packet unflavored gelatin
- 1/4 cup water
- Food coloring (gel works best)
- Optional: a tiny pinch of mica powder if you can find food-grade
Dissolve the gelatin in hot water, add your food coloring, and pour it onto a parchment-lined baking sheet in a very thin layer. Let it dry completely — 12 to 24 hours depending on humidity. Once it’s set and dry, break it up into flakes. You’ll get chunky, translucent pieces that catch light at certain angles.
The result is more “sparkle” than “shimmer.” Good for pressed into frosting or scattered across a cake surface. Useless in cocktails — the flakes are too heavy and they don’t disperse. They’ll just sink.
Shelf life is also a real issue. Gelatin glitter absorbs moisture, so if you’re in a humid kitchen it can go tacky within a day or two.
Colored Sugar / Sugar Glitter
Simpler than gelatin, and honestly more reliable.
What you need:
- 1/4 cup granulated or coarse sugar
- Gel food coloring
- A small zip bag
Put the sugar in the bag, add one small drop of gel coloring, seal it, and massage until the color is even. Spread it on parchment and let it dry for an hour. Done.
This is colored sugar. It looks like colored sugar. There’s no shimmer, no reflectivity — just tinted granules. Totally fine for rimming cocktail glasses or adding texture to a cupcake. Don’t expect it to glow in champagne.
The one upgrade worth making: if you mix in a tiny amount of food-grade pearl dust with your sugar, you’ll get some reflectivity. Still not close to real luster dust, but better than sugar alone.
Actual Luster Dust (What It Is, Why It’s Different)
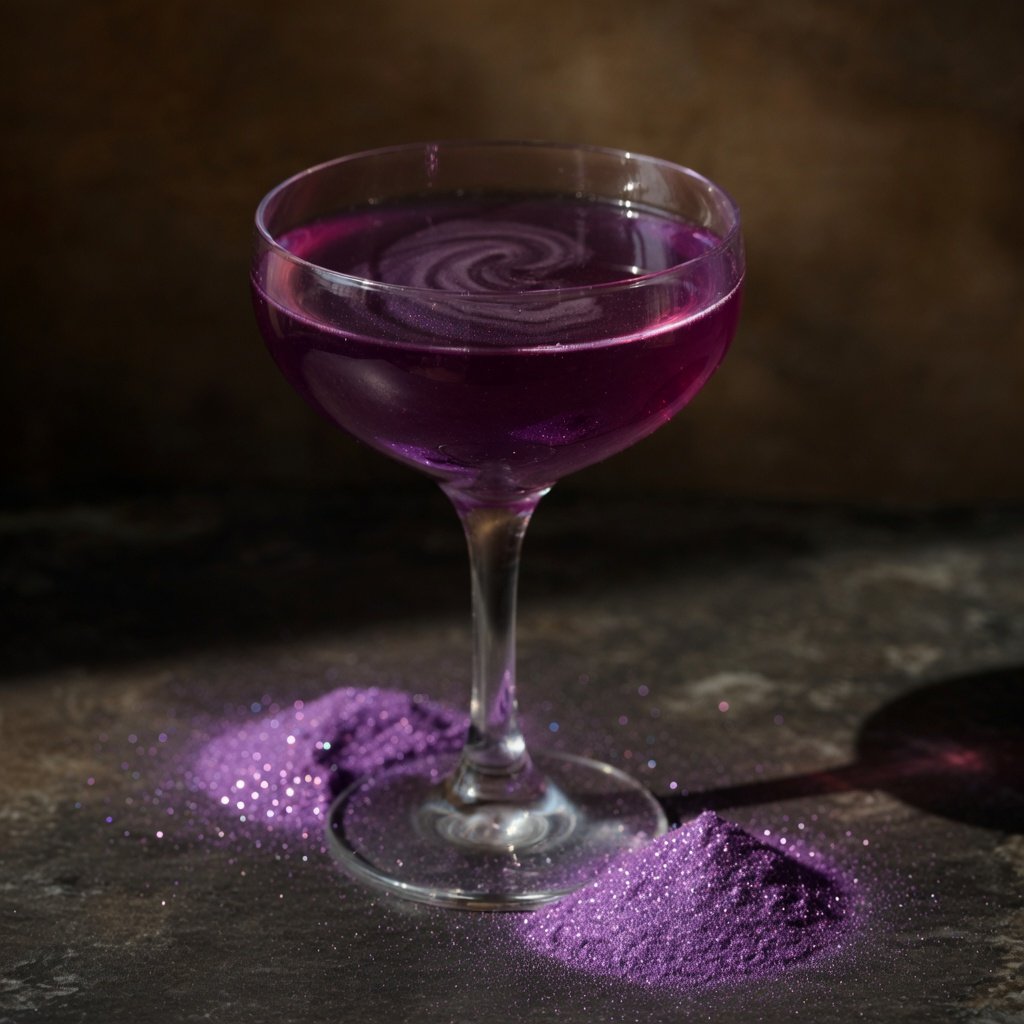
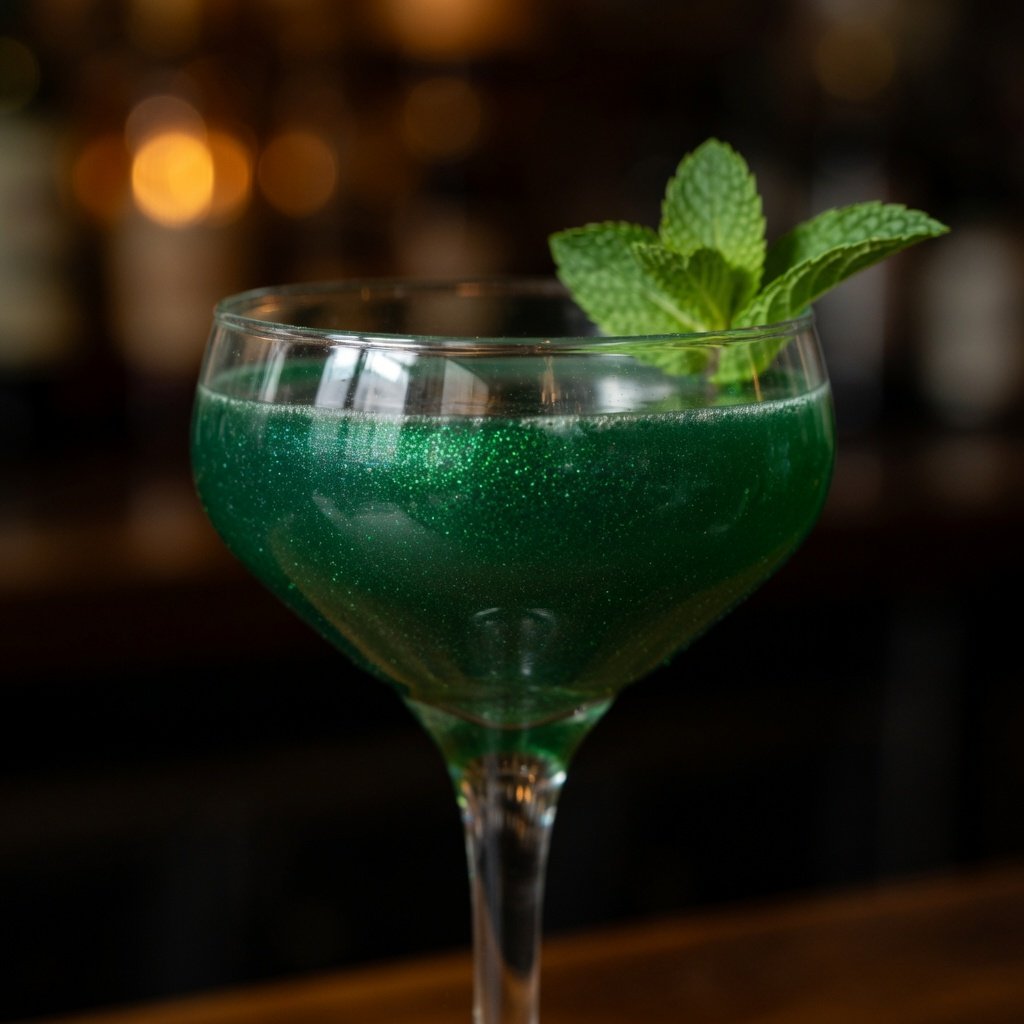
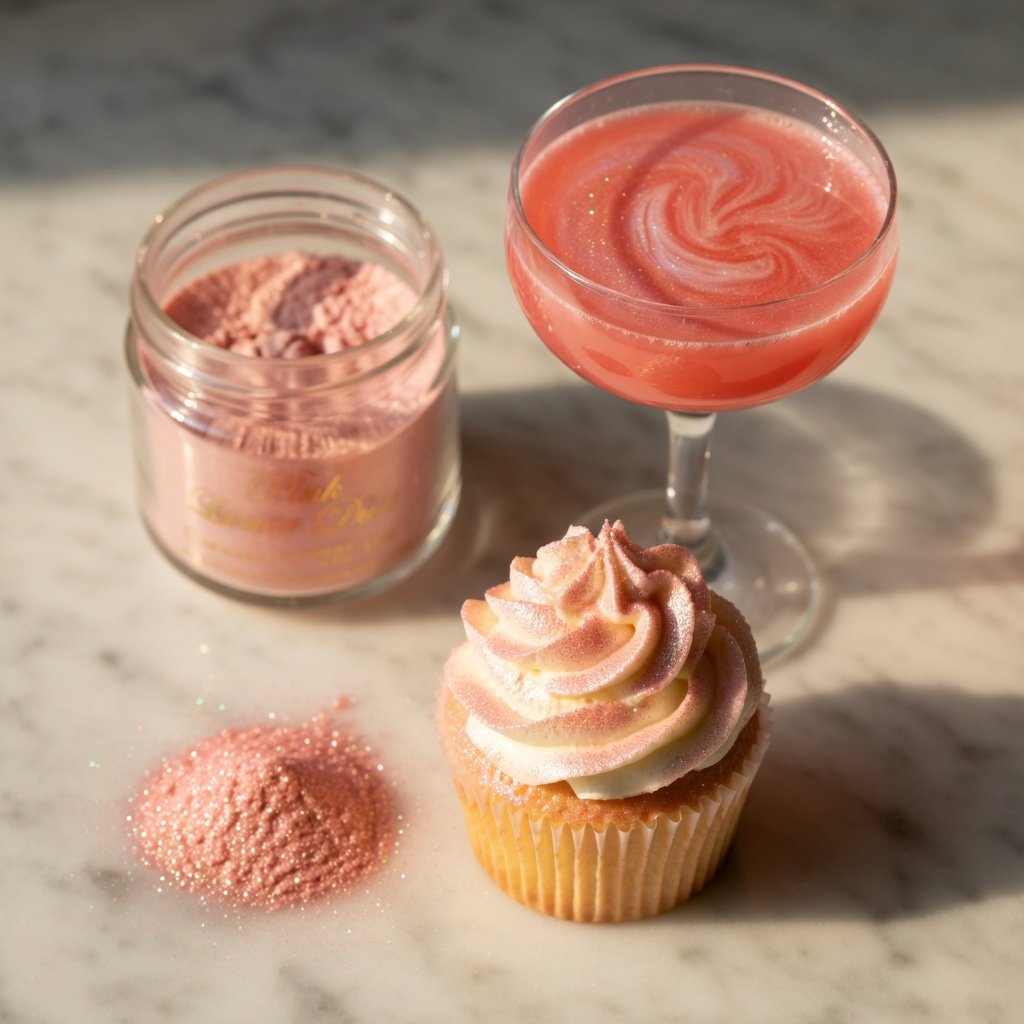
Real luster dust — the kind we make — is mica-based, ultra-fine, and specifically engineered to disperse in liquid and catch light. One jar contains tens of millions of individual particles. Each one is flat, light-reflective, and sized to stay suspended in a drink long enough to create that shimmer effect.
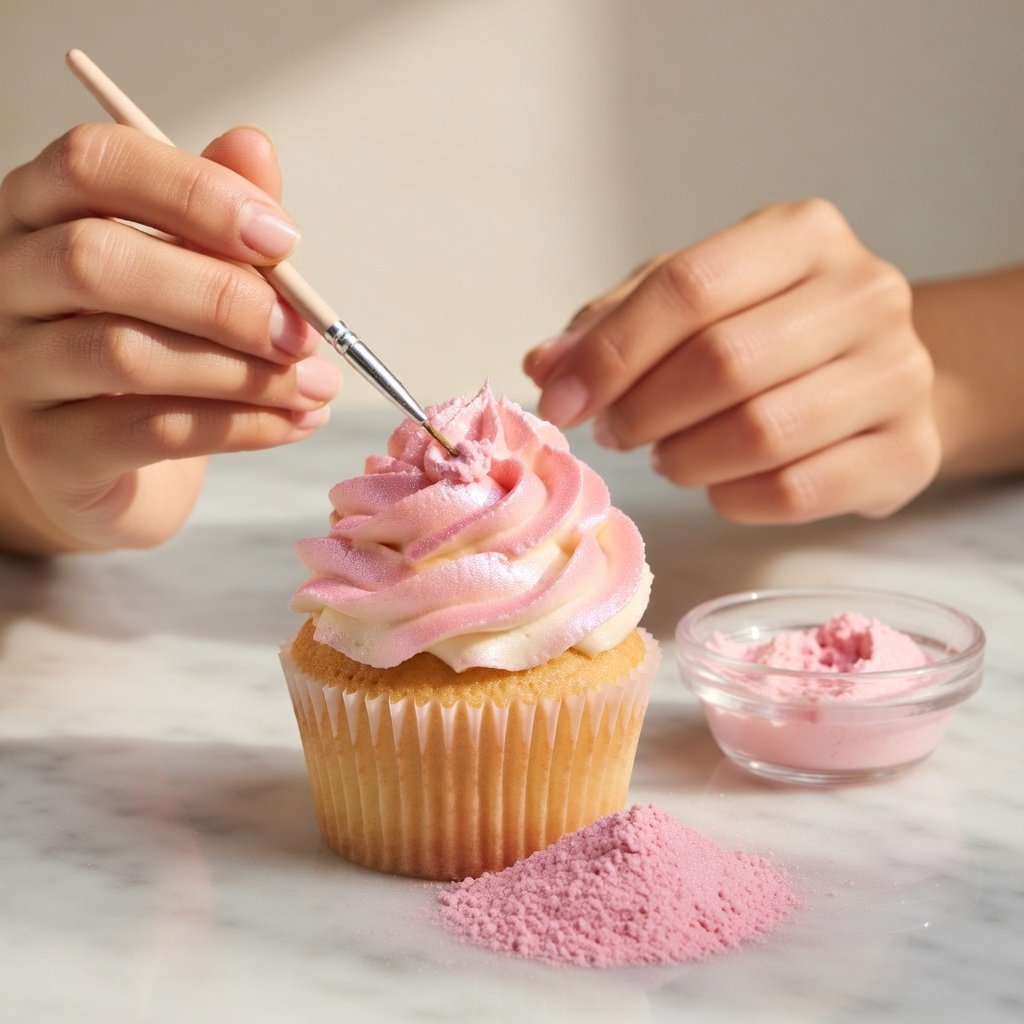
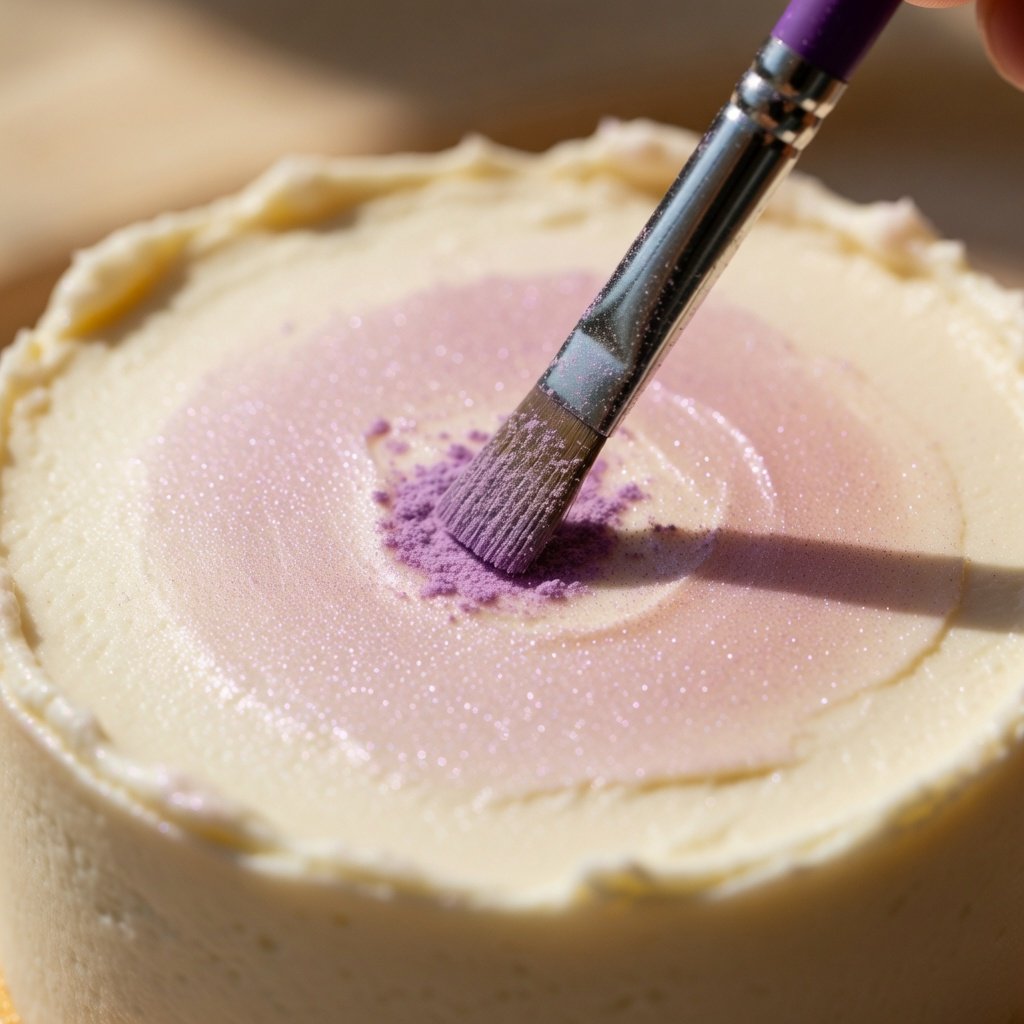
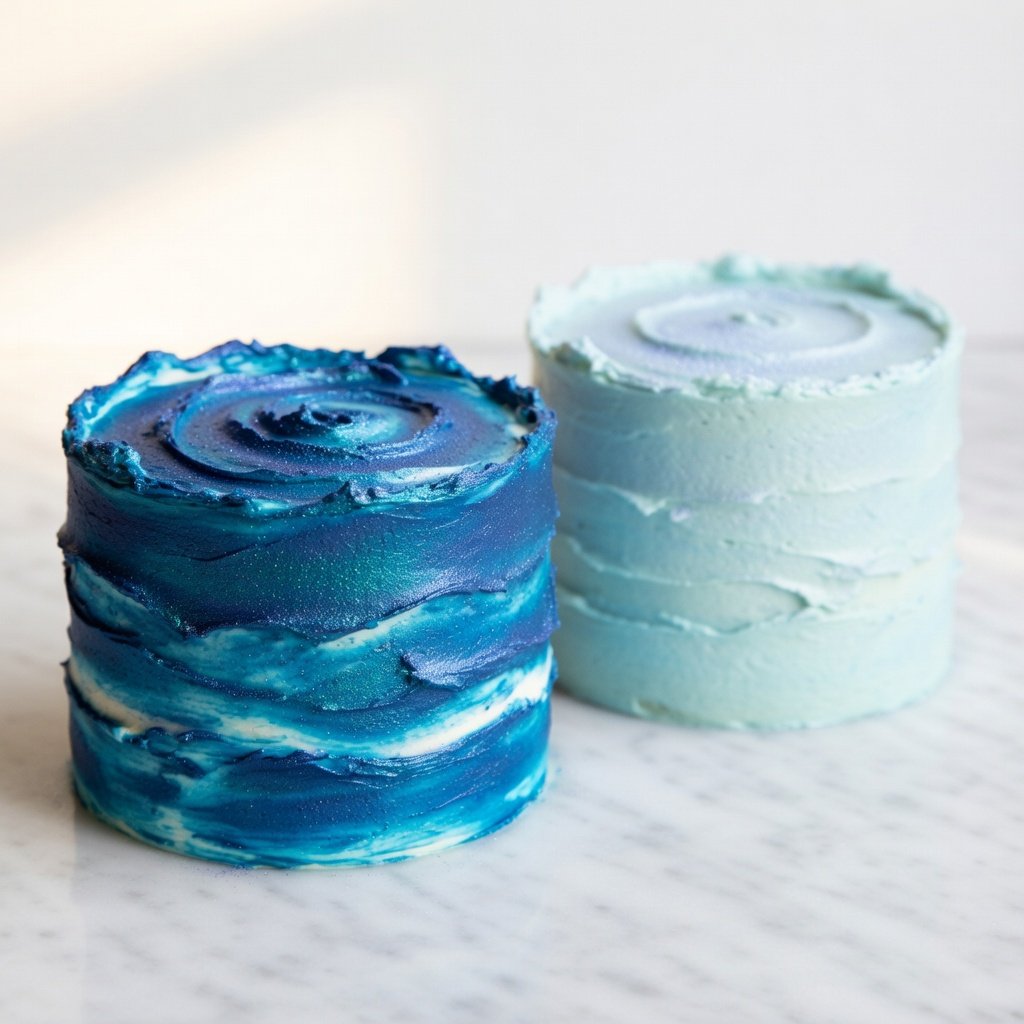
Silver Luster Dust in a dark cocktail looks like liquid metal. Pink Luster Dust brushed over a frosted cake has this soft iridescence that no amount of food coloring will replicate.
It’s also FDA compliant, vegan, gluten-free, and completely tasteless — which matters, because some of the DIY workarounds (especially heavily colored gelatin) can leave a faint chemical taste.
A 10g jar runs $9.98 and gets you 80+ cocktails or enough to cover a lot of cakes. Do the math on what DIY ingredients cost for the same coverage, and store-bought wins.
Where DIY Actually Makes Sense
Not nowhere. There are real situations where homemade works.
If you need a specific color that doesn’t exist in a standard luster dust range — say, a very particular forest green for a themed party — mixing food coloring into sugar gives you full control. If you’re doing a kids’ project and want to make the glitter-making itself part of the activity, gelatin glitter is genuinely fun. And if you need glitter by tonight and your luster dust is out, colored sugar takes 20 minutes.
But for anything involving drinks, serious cake decorating, or a result you actually want to show off? Make it easy on yourself.
The Texture Problem (And Why It Matters)
Here’s something most tutorials skip over: particle size affects more than just looks. It affects how glitter behaves on different surfaces.
Coarse gelatin flakes slide off fondant and won’t stick evenly to buttercream. Fine mica dust adheres to almost any surface and blends into liquid without changing the consistency. For anything delicate — thin chocolate coating, poured ganache, a cocktail — the fineness of real luster dust is what makes it work. You can’t crush gelatin fine enough to replicate it.
This is exactly how commercial edible glitter is made: precision milling, controlled particle size, consistent coating. Not a home kitchen project.
Quick Reality Check on Safety
One thing worth knowing: a lot of products labeled “edible glitter” on Amazon and craft stores aren’t actually edible. If the label says “non-toxic” but not “FDA compliant” or “food-grade,” that’s a cosmetic product. It’s meant for decoration on the outside of things, not consumption.
Look for FDA compliant on the label. Every color we make is — that’s not a nice-to-have, it’s the baseline.
Bottom Line
Make the DIY stuff if you want to experiment, need a custom color, or just enjoy the process. It’s not hard and it’s kind of fun. But go in knowing what it is: colored sugar or gelatin flakes. Pretty, not shimmery.
For actual shimmer — the kind that moves in a drink and makes people ask what you did — you need mica-based luster dust. And that’s just easier to buy than to recreate.
Gelatin-based glitter is too chunky and will sink to the bottom rather than dispersing. Sugar glitter dissolves, which can slightly sweeten your drink. Neither creates the shimmer effect you get from mica-based luster dust. For drinks, store-bought is the only option that actually works the way you want it to.
If you’re using food-grade ingredients — unflavored gelatin, food coloring, regular sugar — yes, it’s safe to eat. The risk is when people buy cheap craft glitter and assume it’s food-safe because it says “non-toxic.” Non-toxic and edible are different things. Stick to ingredients you’d use in any recipe.
Not long. Gelatin glitter is the worst offender — it can go tacky within 24-48 hours in a humid kitchen. Sugar glitter holds up better if kept in an airtight container away from moisture. Store-bought luster dust, by contrast, has a multi-year shelf life. One 10g jar you buy now will still be good in 2026.
“Edible glitter” usually refers to larger flakes or chunky particles — the stuff that shows up as visible sparkle. Luster dust is ultra-fine powder made from mica pigments that creates a smooth metallic or pearlescent sheen. Luster dust disperses in liquid and adheres evenly to surfaces; edible glitter flakes sit on top. Both are used in baking but they produce very different results.
No, not really. The gold shimmer in luster dust comes from mica pigments that are physically coated with iron oxide or other food-grade colorants — it’s a manufacturing process, not a kitchen one. You can make gold-colored sugar, but it won’t have the metallic reflectivity of actual gold luster dust. Some things are just better bought.