✦ FDA Compliant✦ Vegan & Gluten-Free✦ German Mica Pigments✦ Free Shipping Over $50✦ 13 Colors
April 17, 2026·8 min read
How to Use Edible Glitter on Cakes, Cupcakes & Cookies
✦ Key Takeaways
• Dry dusting with a soft brush gives you the most control — best for fondant and firm surfaces
• Mix luster dust with a tiny amount of vodka or lemon extract for painting on smooth fondant or tiers
• More dust doesn’t mean more shimmer — a little goes a long way, especially on buttercream
• Gold and rose gold are your safest bets on light frostings; silver earns its place on dark chocolate
How to Use Edible Glitter on Cakes, Cupcakes & Cookies
Luster dust looks intimidating until you use it once. Then it becomes the thing you put on everything. The basics are simple — dry dusting, wet painting, or a quick shimmer wash — and once you know which method works on which surface, you’re basically unstoppable. Here’s what actually works.
The Two Main Methods (And When to Use Each)
Every luster dust technique comes down to one question: is your surface dry and firm, or soft and slightly tacky? That answer determines everything.
Dry dusting is exactly what it sounds like — load a soft brush with luster dust and apply it directly to the surface. No liquid, no mixing. This is your go-to for fondant, macarons, sugar cookies with royal icing, and molded chocolate. The key is a dry, clean brush and a light hand. Tap off any excess before you touch the cake.
Wet painting means mixing your luster dust with a high-proof alcohol — vodka works, but lemon or orange extract is better if there are kids involved — to create a metallic paint. You get clean lines, even coverage, and that full metallic finish you see on painted fondant tiers. The alcohol evaporates quickly and takes any raw taste with it. Water won’t work here; it makes the mixture muddy and slow-drying.
Whole cakes are where luster dust really shows what it can do. The approach changes depending on what’s underneath it.
On fondant: Dry dusting works for an all-over shimmer. Use a wide, flat brush and work in circular motions. For deeper color or a metallic paint finish on smooth tiers, go wet — mix about 1/4 teaspoon of luster dust with just enough vodka to make a thin paste, then apply with a flat shader brush. Build it up in thin layers rather than trying to do it all at once.
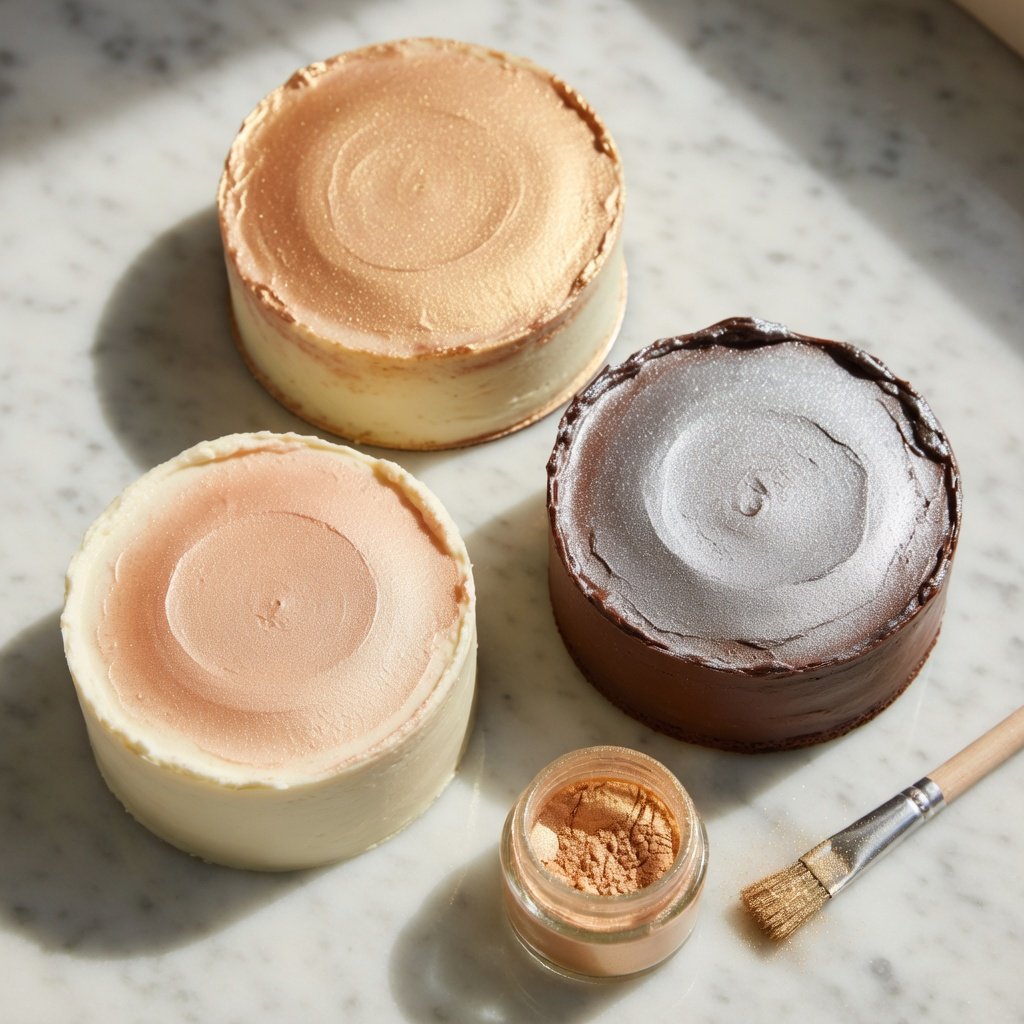
On buttercream: This one’s trickier. Buttercream is soft and a little greasy, which means heavy application will pull the surface. Use a light dusting brush — barely loaded — and work in one direction. Circular motions on buttercream can drag and look uneven. Gold Luster Dust catches beautifully on white or vanilla buttercream because the warm tone plays off the cream color. Rose gold reads even softer and more romantic. Rose Gold Luster Dust
On chocolate ganache: Don’t skip Silver Luster Dust on dark ganache. Seriously. The contrast is absurd — silver on near-black ganache looks like something from a high-end patisserie. Let the ganache fully set before dusting, and apply dry with a fan brush for even coverage.
Cupcakes are actually the easiest place to practice. Small surface, low stakes, fast results.
For swirled buttercream, hold the loaded brush about two inches above the cupcake and tap it lightly. The dust falls like snow and lands evenly across the peaks and valleys of the swirl — you get this scattered shimmer that looks intentional and expensive. It’s a good trick.
For a fully coated look, dust directly onto the frosting with a soft brush. Keep the frosting slightly chilled first so it’s firmer and won’t drag. About 1/8 teaspoon per dozen cupcakes is plenty. More than that and you start losing definition in the frosting texture.
Royal icing–topped cupcakes? Apply after the icing is fully set and dry. The hard surface holds the dust better than any other frosting, and the shimmer has a glass-like quality on that flat finish.
Sugar cookies with royal icing are probably the single best surface for luster dust. The icing is hard, flat, and smooth — the dust adheres perfectly and the shimmer really pops.
Wait until the royal icing is completely dry. Not “mostly dry,” not “dry on top.” Completely dry, all the way through — usually 6-8 hours minimum, overnight if you can wait. Then dust with a soft brush in light, even strokes. One pass is usually enough.
For painted cookies, the wet method gives you incredible detail. Mix luster dust into a paste with a drop of vodka and use a fine-tip paintbrush. You can do lettering, outlines, full metallic fills. Gold is classic, but rose gold on pale pink cookies is genuinely ridiculous in the best way.
Shortbread without icing can take a very light dusting directly on the surface, but the shimmer effect is subtler — the texture absorbs some of it. Still looks great on a cookie platter. Just don’t expect the same intensity you’d get on royal icing.
The Mistakes That Actually Happen
Too much at once is the big one. The instinct is to load the brush and go heavy, but luster dust builds up fast and unevenly. Start with less than you think you need. You can always add another pass.
Using water instead of alcohol for the wet method. Water makes the mixture thick, slow to dry, and slightly grainy. Alcohol evaporates almost immediately and leaves clean, saturated color. High-proof vodka is fine. Clear extract works. Don’t use water.
Applying dust to wet or soft frosting with too much pressure. On buttercream especially, dragging the brush pulls the surface and looks rough. Load the brush, then barely touch the frosting — more of a deposit than a stroke. Or hold the brush above the surface and tap the handle to let the dust fall.
Storing the jar with a contaminated brush. If your brush has frosting on it and goes back in the jar, the whole jar clumps. Use a clean brush every time, or tip a small amount of dust onto a palette or plate before loading your brush.
Picking the Right Color
Gold is the crowd-pleaser. It works on almost every frosting color and gives that warm, celebration-appropriate shimmer that reads as fancy without being over the top. Our go-to for most cakes.
Rose gold is gold’s more romantic sibling. It leans pink-warm, which makes it perfect for wedding cakes, birthday cakes for anyone who loves the aesthetic, and anything with blush, cream, or white frosting. Layered with actual gold on a two-tier cake? That combination is really something.
Silver earns its place when the base is dark — dark chocolate, navy, black fondant, deep burgundy. It doesn’t compete with warm tones the way it can on lighter bases. Drop silver on white buttercream and it can look a little cold. Put it on a chocolate ganache drip cake and it looks like it belongs in a shop window.
The other colors — purple, blue, pink, green — work best as accents or for themed designs. They don’t have the same versatility as the metallics, but on the right cake they’re exactly right. A deep blue luster dust on a galaxy-themed cake is genuinely stunning.
What You Actually Need
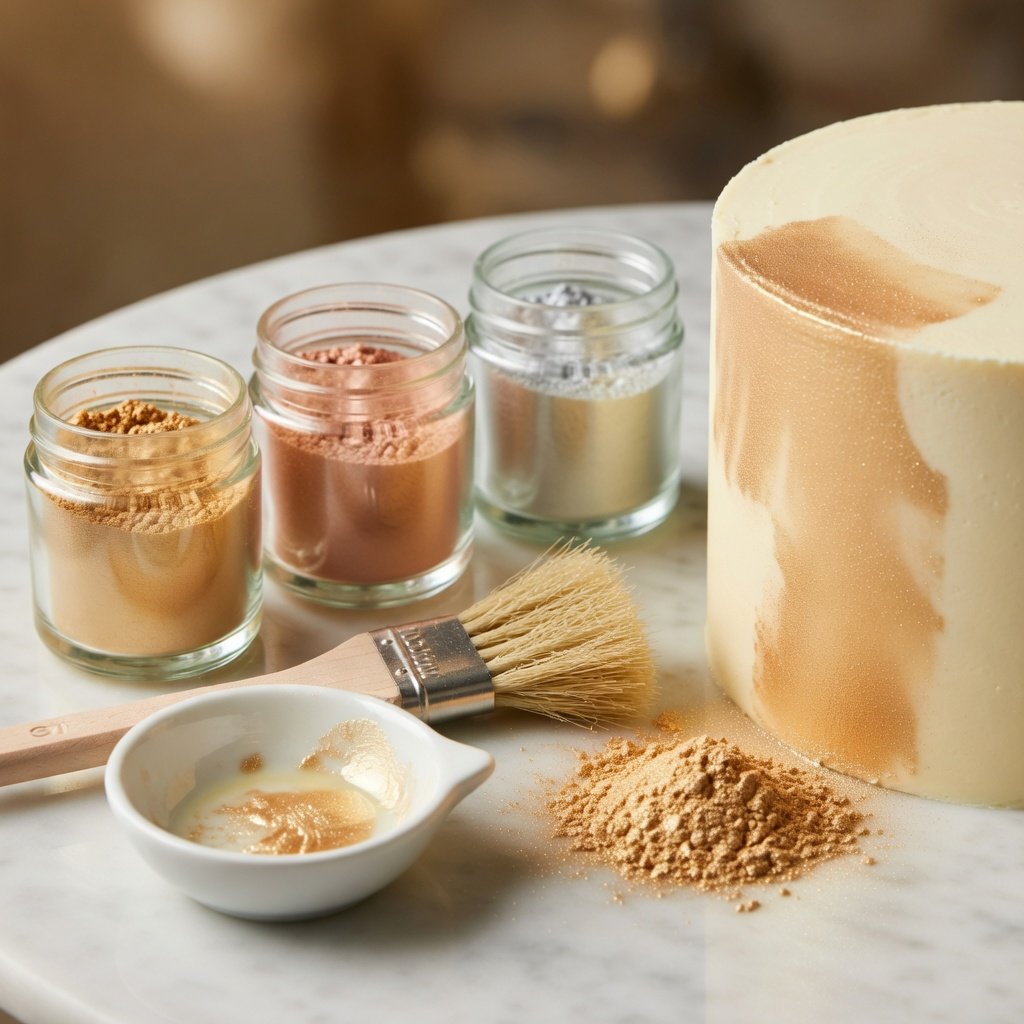
You don’t need much to start. A few soft brushes in different sizes — a wide flat brush for broad coverage, a fan brush for dusting, a small detail brush for painting. A ceramic palette or small glass dish for mixing wet applications. That’s it.
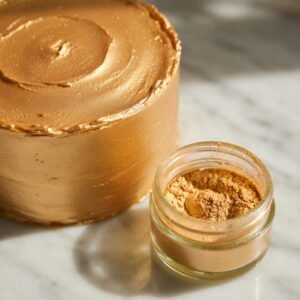
The luster dust itself goes a long way. A 10g jar covers a lot of cakes — we’re talking dozens of applications from one jar if you’re using it right. The German mica pigments in ours are denser and more reflective than cheaper alternatives, which means you need less to get the effect you’re after. A pinch really is a pinch.
Keep your jars sealed between uses. Humidity is the enemy. The dust doesn’t spoil, but it can clump if moisture gets in, and nobody wants to spend five minutes breaking up clumps mid-project.
Yes, but apply it dry and light. Use a barely-loaded brush and work in one direction. Buttercream is soft, so too much pressure will drag the surface. Keep the frosting cold for best results — pop the cake in the fridge for 15 minutes before dusting.
You don’t have to use vodka — any high-proof, clear, food-safe alcohol works. Clear vanilla or lemon extract also works well and is a better call around kids. Water doesn’t work for wet painting. It makes the mixture slow to dry and leaves it looking patchy. Stick to alcohol-based liquids.
For a dry-dusted finish on a standard 8-inch fondant cake, about 1/2 teaspoon is usually enough for light coverage. For a full painted metallic finish, plan for closer to 1 teaspoon. Our 10g jars hold roughly 2.5 teaspoons of product, so one jar handles multiple cakes.
No. Luster dust is completely tasteless and odorless. It’s made from food-grade mica pigments — same material that’s been used in edible products for decades. Your guests won’t taste anything different. They’ll just notice the cake looks significantly better.
Our luster dust is fully FDA compliant, made with food-grade mica pigments, and is vegan and gluten-free. Edible and non-toxic are not the same thing — non-toxic just means it won’t cause harm, while edible means it’s approved as actual food. Ours is edible. Look for FDA compliant on any luster dust label before putting it on food.
Absolutely. Gold and rose gold together give a beautiful warm gradient effect on fondant. Silver and white mixed produce a softer pearl tone. Start with small amounts on a palette first to test the blend before committing to the whole jar.
How to Use Edible Glitter on Cakes, Cupcakes & Cookies
✦ Key Takeaways
• Luster dust works differently on different surfaces — buttercream, fondant, and royal icing each need a slightly different approach
• Dry brushing gives you control; mixing with alcohol gives you intensity — know which one you need before you start
• More isn’t more. A light hand produces that expensive shimmer. Heavy-handed application just looks muddy.
• Every color on this site is FDA compliant and tasteless — it won’t change how your cake tastes, only how it looks
Edible glitter for cakes is one of those things that looks complicated and isn’t. A soft brush, a steady hand, and about 90 seconds of your time — that’s genuinely all it takes to go from “nice cake” to “how did you do that?”
The trick is knowing which technique to use on which surface. Dry dust on fondant hits different than dry dust on buttercream. A painted luster finish on royal icing looks nothing like a brushed one. Get that part right and the rest takes care of itself.
Here’s how to do it properly.
First, Know Your Surface
Different frostings behave differently with luster dust, and that changes your approach.
Buttercream is the best surface for dry dusting. It’s slightly tacky, which means the dust grips without any activator. The shimmer also catches the light beautifully on that smooth, slightly glossy finish — better than almost anything else. Our metallic buttercream recipe uses this to full effect, and the results look absurdly professional for how little effort it takes.
Fondant is where painted finishes really shine. Because fondant is smoother and drier, dry dust can look a little uneven — especially on large flat surfaces. Mix your luster dust with a few drops of food-grade alcohol (vodka or lemon extract both work), and you can paint it on like a metallic coat. Covers consistently, dries fast.
Royal icing takes dry dust fine once it’s fully hardened. Try to apply it while the icing is still wet and you’ll just make a mess. Let it cure completely — ideally overnight — then brush on your shimmer.
The Three Techniques, Explained
This is the one you’ll use 80% of the time. Grab a soft food-safe brush — a wide flat brush for large areas, a smaller round one for detail work. Dip it into the jar, tap off the excess on the edge (this part matters — too much at once and you lose control), then apply in light, sweeping strokes.
Build it up in layers if you want more intensity. One pass gives you a subtle sheen. Three passes gives you full metallic coverage. Don’t try to get there in one heavy coat — you’ll get streaks.
Gold Luster Dust is the go-to for this technique on light-colored frostings. The warm tone reads beautifully in natural light and photographs like a dream.
Dry brushing also works great for accent details — edges, ruffles, the peaks of piped rosettes. A tiny bit of gold on the tip of a swirl makes the whole cupcake look intentional.
Mix roughly 1/4 teaspoon of luster dust with 4-5 drops of food-grade alcohol. Stir until you get a smooth, slightly thick paint. Too watery and it’ll run; too thick and it drags.
Test on a small area first. The alcohol evaporates in about 30 seconds, leaving the pigment behind — that’s when you see the true color. What looks dark and wet when applied will dry to a clean metallic finish.
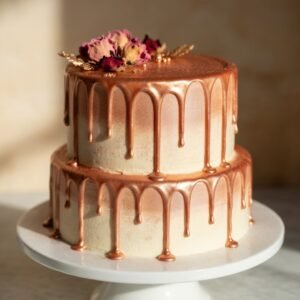
This method is best for full coverage on fondant or for painting specific design elements — geometric patterns, marbled effects, hand-painted florals. Rose Gold Luster Dust mixed this way on white fondant is genuinely one of our favorite finishes. It’s the backbone of our Rose Gold Drip Cake recipe.
One thing: use real vodka or clear lemon extract. Not water. Water activates the sugar in fondant and gets sticky. Alcohol evaporates clean.
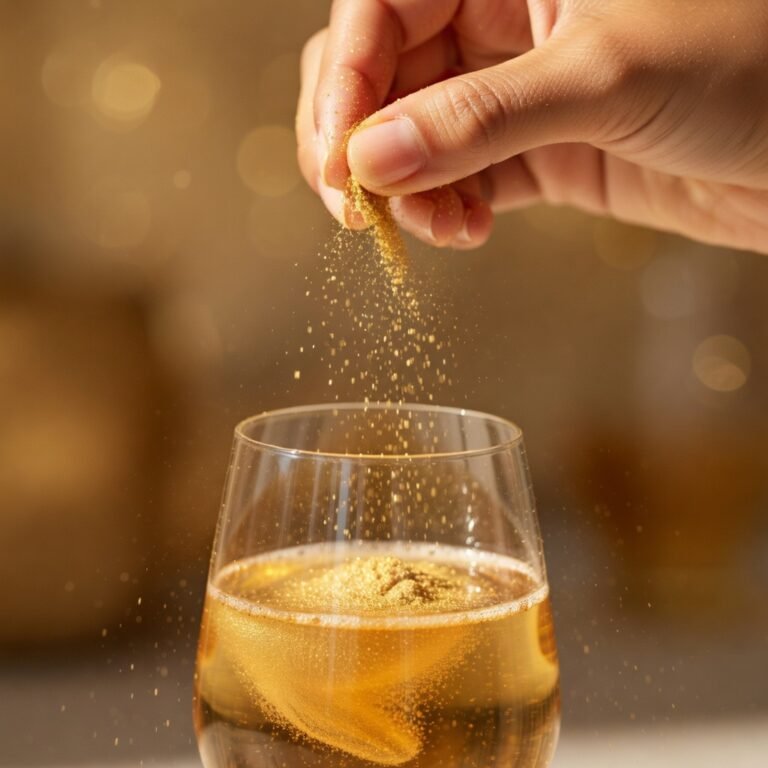
This is the most dramatic and the least precise — meaning it’s great for certain looks and terrible for others. You’re essentially tapping or sifting the dust loosely over the surface to create a scattered shimmer effect.
Works beautifully on mirror glaze cakes, where the glaze itself gives you a reflective base and the luster dust catches on the surface highlights. Our Galaxy Mirror Glaze Cake uses this technique — the loose silver and blue dust on top of the glaze creates that deep-space look.
Also good for covering small imperfections on a rustic or semi-naked cake, where you want shimmer without structure.
Silver Luster Dust used this way on dark chocolate ganache is — and we’ve said this before — absurdly good. Silver on dark is one of those combinations that looks expensive without trying to. If you want to go deeper on chocolate specifically, we covered that in detail in our guide to using luster dust on chocolate.
The right luster dust cake application tools — a soft brush, mixing dish, and quality pigment — make all the difference in your finish.
Cakes, Cupcakes, and Cookies — What Changes
The techniques are the same. The scale is different, and that changes a few things in practice.
Cakes
On a full cake, consistency matters. If you’re dry brushing a buttercream tier, do the whole tier in one session so the coverage is even. Taking a break mid-application and coming back means your first strokes will have dried and set slightly differently than your new ones — you’ll see the line.
For tiered cakes, work from the bottom up so you’re not dripping dust onto already-finished tiers. And don’t skip the back. People walk around cakes. The 30 seconds it takes to hit the back panel is worth it.
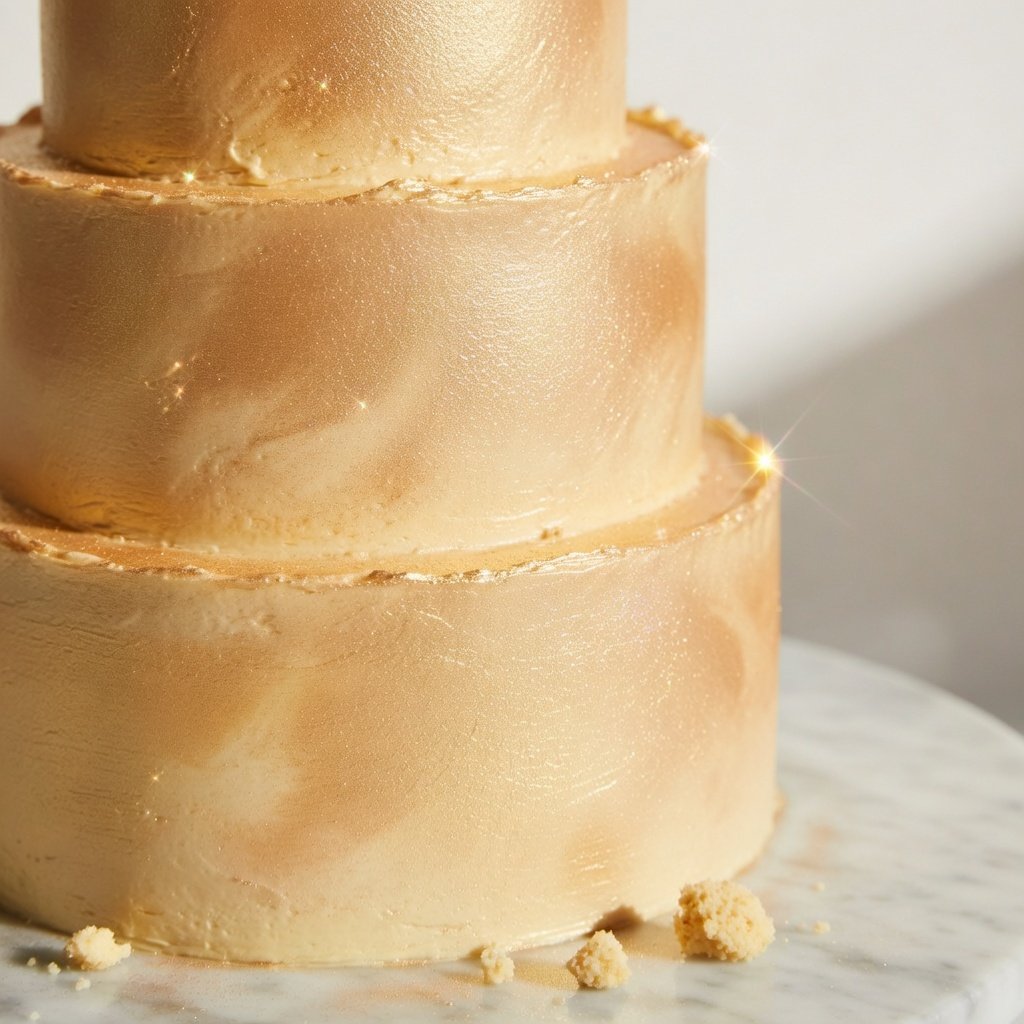
Large fondant cakes painted with alcohol are the most dramatic finish you can do. One coat of Gold Luster Dust over a smooth white fondant cake looks like actual hammered metal. If you want to see what that looks like in a real recipe context, the TikTok Glitter Bomb Cake is exactly this — and the reaction it gets is genuinely wild.
Cupcakes
Cupcakes are honestly the easiest place to practice. Small surface, low stakes, repeatable. The swirl of a piped rosette is perfect for dry brushing — hit the peaks and let the valleys stay darker for depth. Takes about 10 seconds per cupcake once you’ve got the motion down.
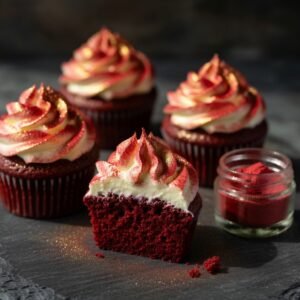
If you want step-by-step detail for cupcakes specifically, we have a full post on using luster dust on cupcakes that goes deeper. The Red Velvet Shimmer Cupcakes recipe is a great starting point — the red-and-gold combination is one of those things that photographs incredibly well.
Cookies
Royal icing cookies need that full cure time before you touch them with dust. Rush it and the brush drags, the icing cracks, and the shimmer goes everywhere it’s not supposed to. Patience here is actually a skill.
Once cured, dry brushing is usually all you need. For detailed flood-work cookies — letters, flowers, intricate patterns — use a very small brush and work section by section. If you’re doing a lot of cookies regularly, the dedicated post on luster dust on cookies covers the full workflow.
Color Selection
Most people default to gold and that’s — honestly, fair. It’s the most versatile, it photographs best, and it reads as “celebratory” without being specific to any occasion.
But the other colors do things gold can’t. Rose Gold Luster Dust is the move for weddings, baby showers, anything with a warm pink or blush palette. Silver Luster Dust works better on cool-toned cakes, dark bases, and anything modern or architectural in style.
There’s a longer breakdown on how all the dust types compare — luster vs. disco vs. petal — if you’re not sure what category of product you actually need. Worth reading if you’ve ever bought something that didn’t give you the shimmer you expected: Luster Dust vs. Disco Dust vs. Petal Dust.
Common Mistakes (And How to Avoid Them)
Using too much at once. This is the big one. Start with less than you think you need. You can always add more; you can’t take it off a finished cake.
Applying to wet frosting. If your buttercream just came out of the piping bag, wait 15-20 minutes. A slightly set surface grips the dust better and prevents smearing.
Using the wrong brush. A stiff brush scratches soft frostings and creates drag marks. Use a soft, wide brush for coverage and a soft, fine-tipped brush for details. Cheap craft brushes work fine — just make sure they’re dedicated food-only brushes.
Skipping the tap. Always tap excess off the brush before application. Always. That first stroke with a loaded brush is where you ruin a finished cake.
Not always. On buttercream, you can apply it dry directly from the jar — the surface has enough tack to hold the pigment. On fondant, mixing with a few drops of food-grade alcohol gives you better, more even coverage. On royal icing, dry works great once the icing is fully cured.
Less than you’d think. For a single-tier 6″ cake with dry brush coverage, you’re using maybe 1/8 to 1/4 teaspoon. A 10g jar is 80-100 uses for single-color light coverage — it goes a long way. If you’re going full metallic paint coverage on a larger cake, expect to use more. Our sizing guide gives specific numbers by cake size.
Luster dust finishes are stable — they don’t oxidize or fade the way some food colorings do. On fondant with the alcohol method, the finish holds for days. On buttercream, the shimmer stays vibrant as long as the frosting doesn’t crust over heavily. Refrigeration can occasionally cause slight condensation that mutes the shimmer temporarily, but it comes back as the cake returns to room temperature.
Yes — ours is. Every color we sell is FDA compliant, made from food-grade mica pigments, vegan, gluten-free, and completely tasteless. The distinction that matters: “non-toxic” and “edible” are not the same thing. If you see a product labeled only as non-toxic, it’s not food. Ours is food. We’ve got a full post on edible glitter safety and FDA rules if you want the complete breakdown.
Yes, and it works really well. Mix luster dust directly into white or light-colored buttercream until you hit the intensity you want — usually 1/4 to 1/2 teaspoon per cup of frosting. The shimmer distributes through the frosting and shows in every swirl. Our Metallic Buttercream Frosting recipe has the exact ratios.