Posted on Leave a comment

Cinco de Mayo Shimmer Cocktails

Cocktail edible glitter swirling through two margaritas — one with green edible glitter, one gold shimmer, on a festive Cinco de Mayo table with lime wedges and salt rims
Key Takeaways

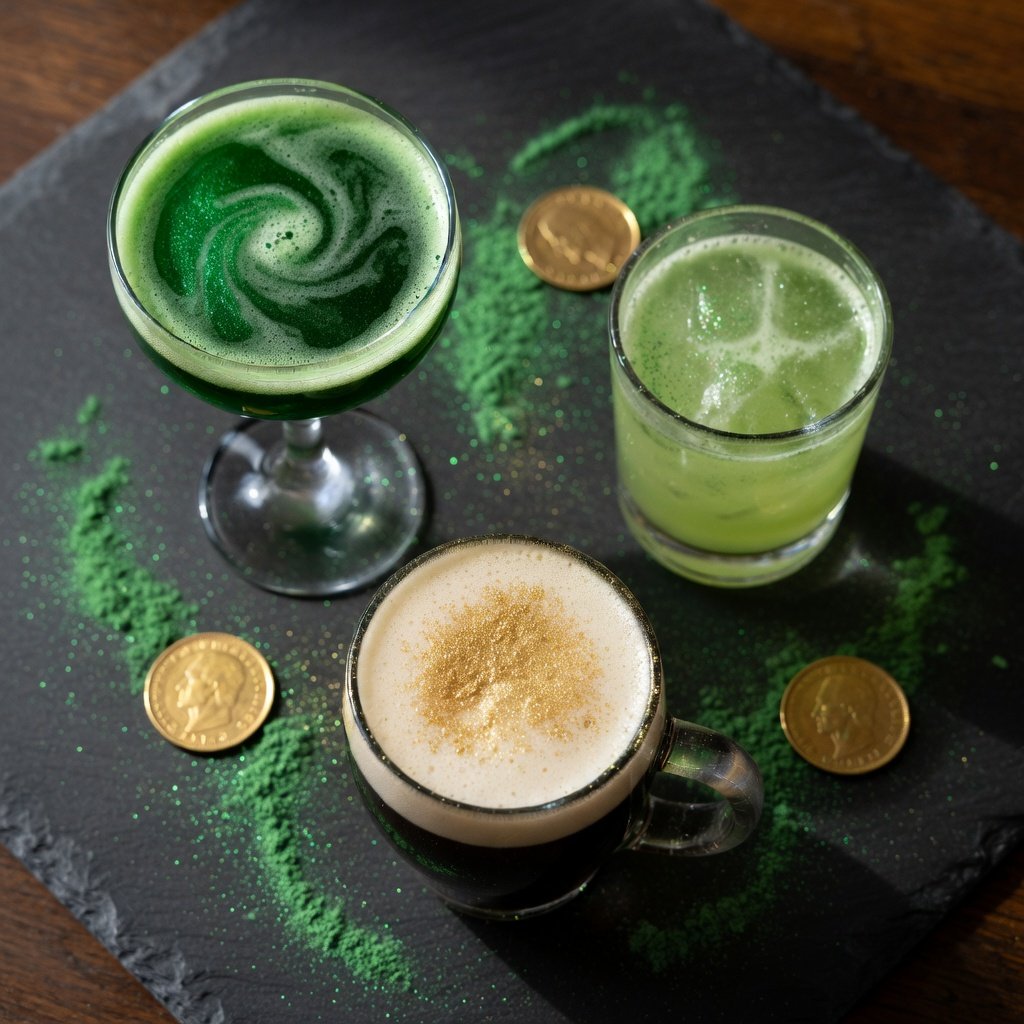
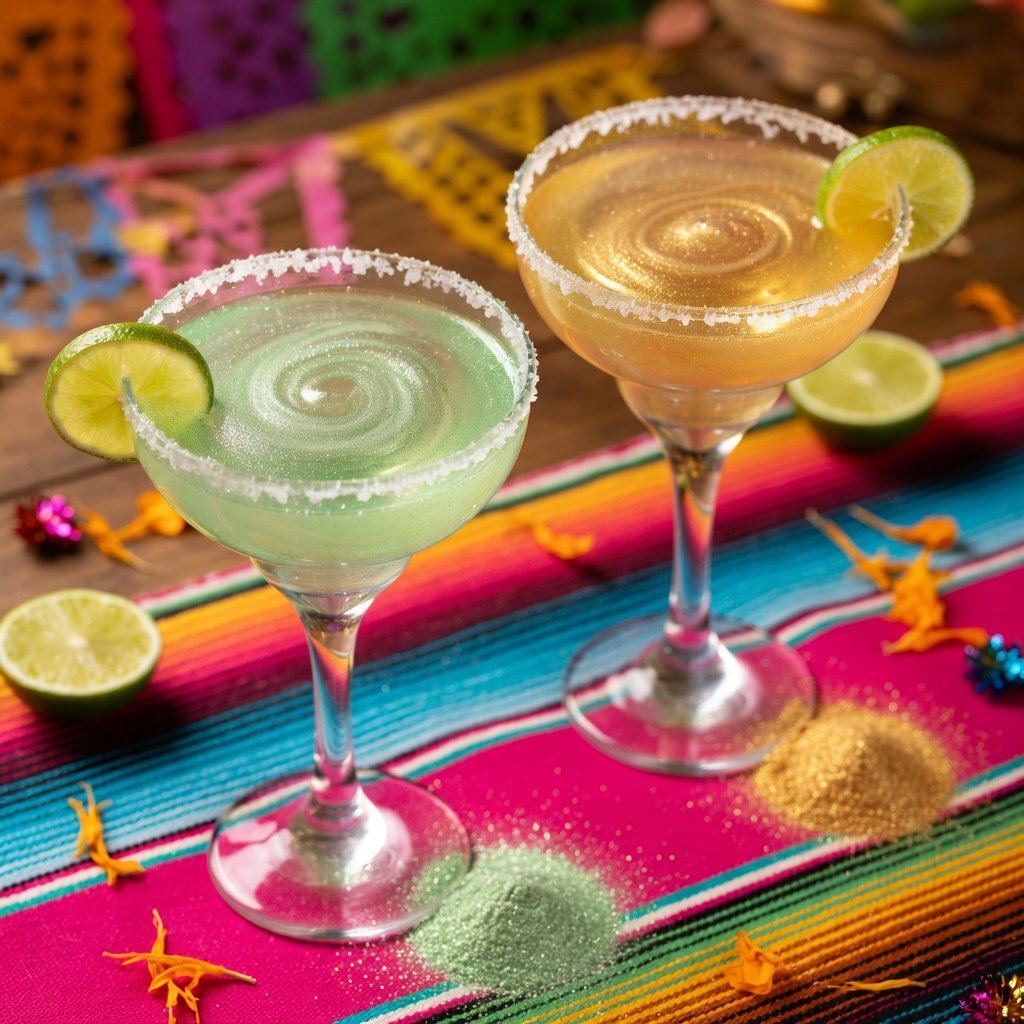
– Green and gold luster dust are the move for Cinco de Mayo cocktails — they hit the holiday colors without being kitschy
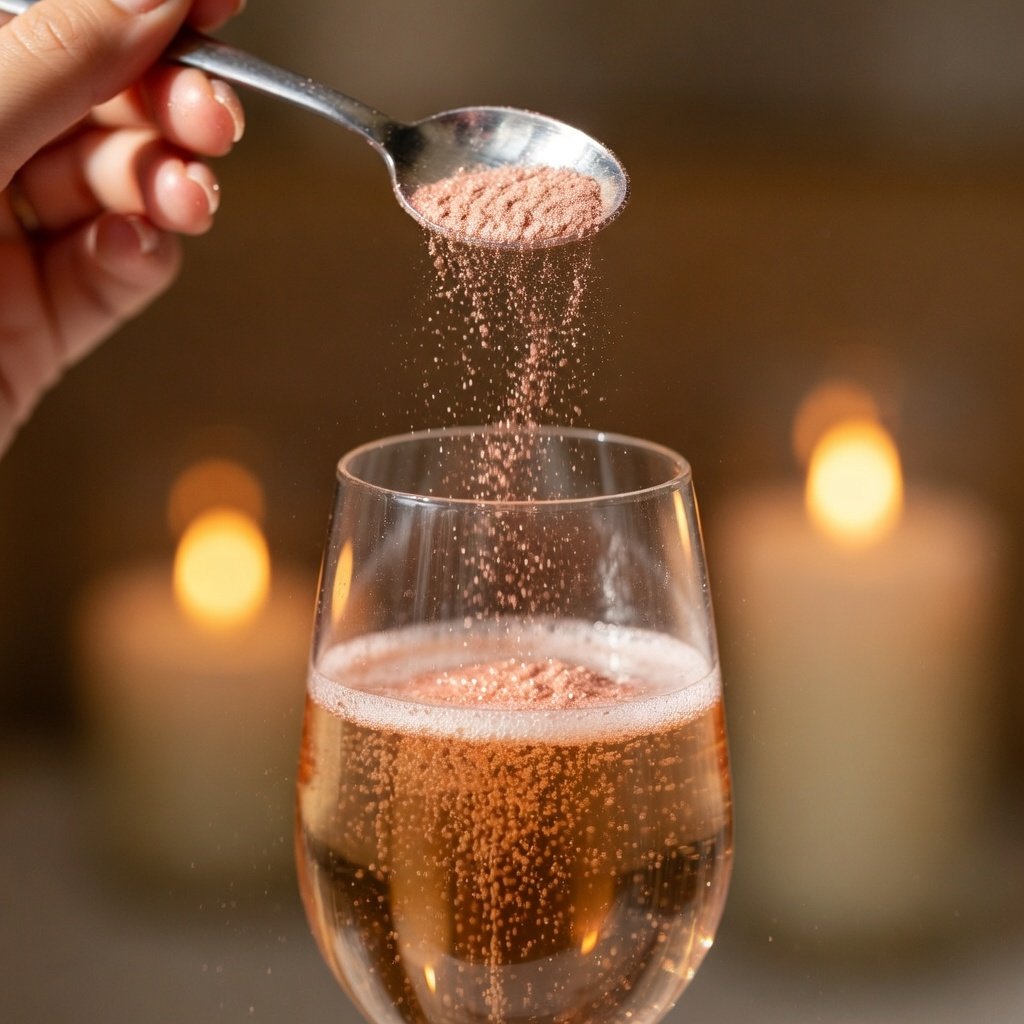
– A pinch of cocktail edible glitter goes in the glass before you pour — not after
– Light green reads bright and lime-like; regular green is deeper and more saturated — both work, just differently
– These techniques work on mocktails too, not just tequila drinks

Cinco de Mayo Shimmer Cocktails

Cinco de Mayo is already a great excuse to make good drinks. Add cocktail edible glitter and you’ve got something people will actually photograph before they drink. Here’s how to pull it off — color choices, techniques, and three specific drinks worth making.

Which Colors to Use

The holiday palette basically hands you the answer: green and gold. But there’s more nuance here than you’d think.

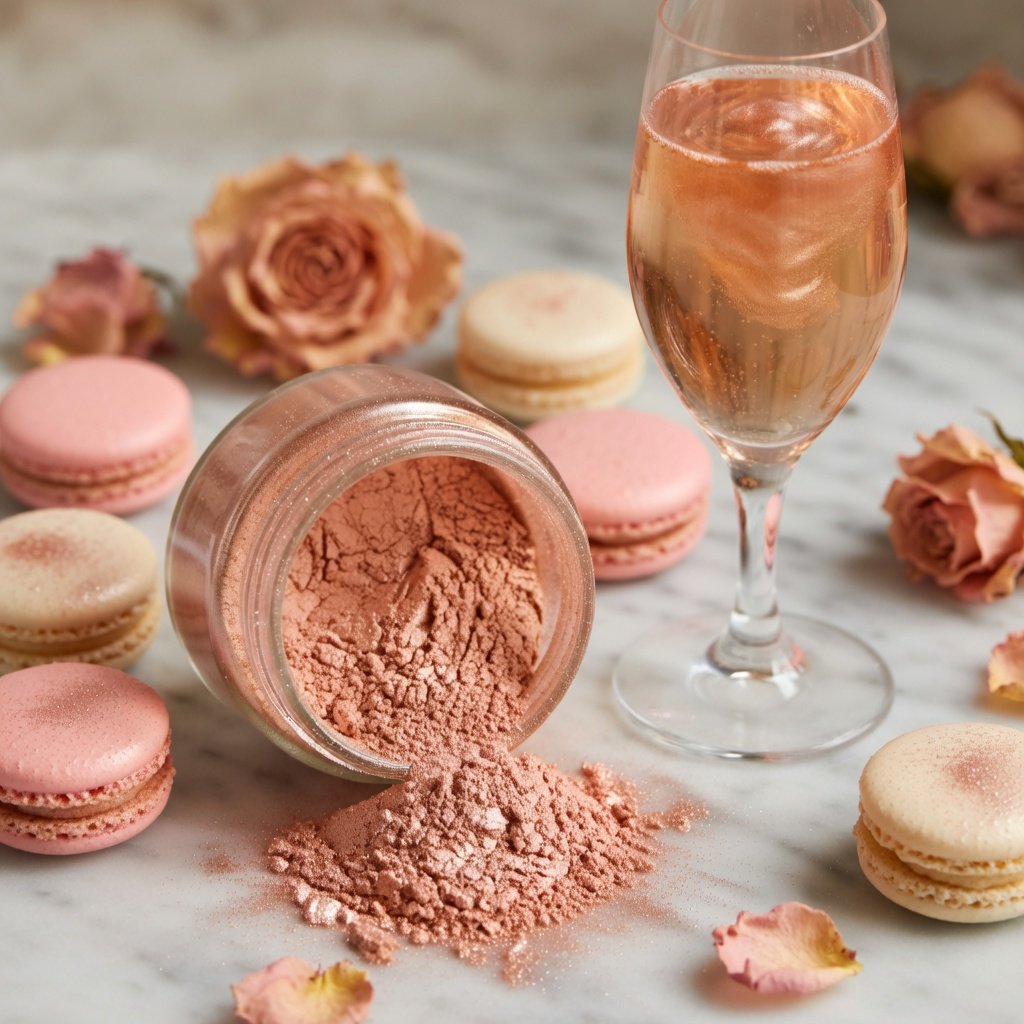
Light Green Luster Dust is the one we’d reach for first in a margarita. It’s bright, almost lime-tinted — it looks intentional in a way that matches the citrus vibe of the drink. Drop a pinch into a classic margarita on the rocks and it catches the light every time someone shifts the glass. Really satisfying.

Green Luster Dust is deeper and more saturated. Better for darker cocktails — a mezcal negroni, say, or anything with muddled herbs. On a bright, icy margarita it can read a little dark. On a smoky, complex drink it looks deliberate and cool.

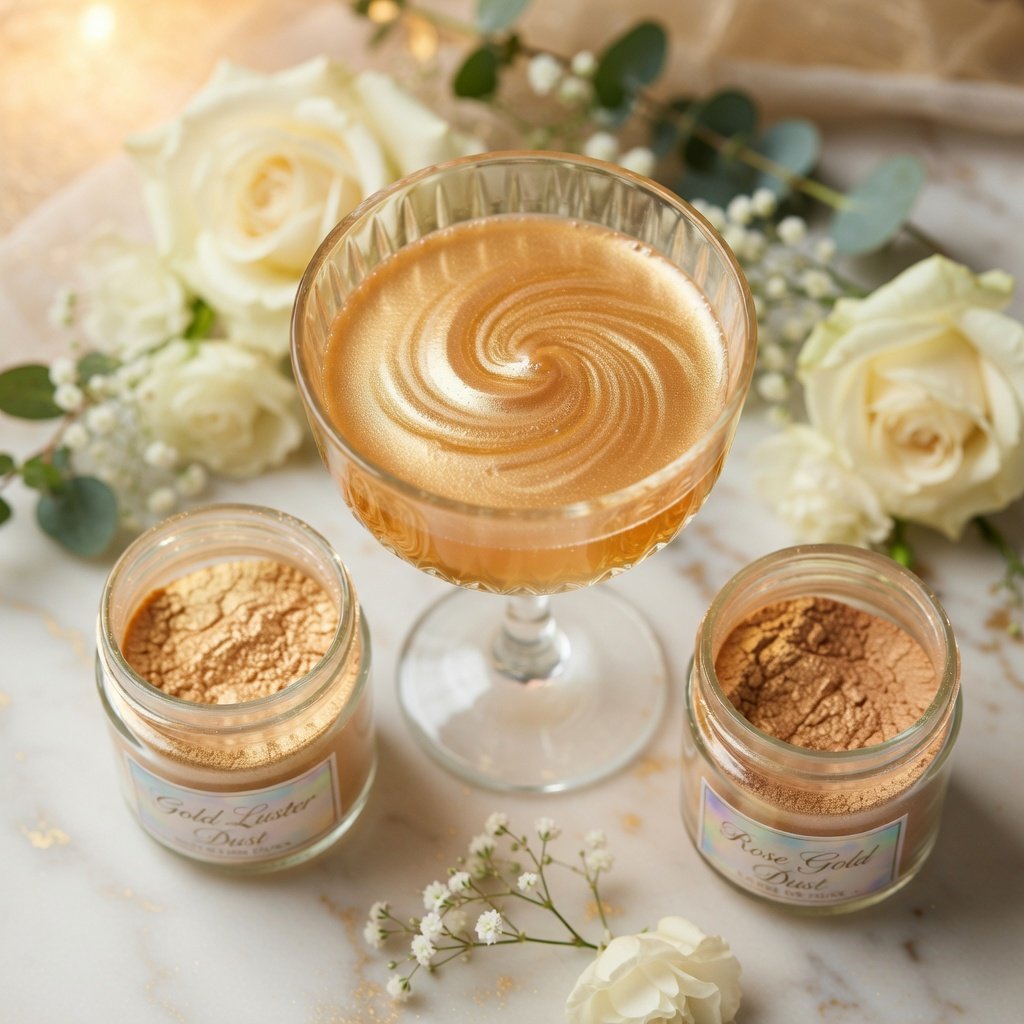
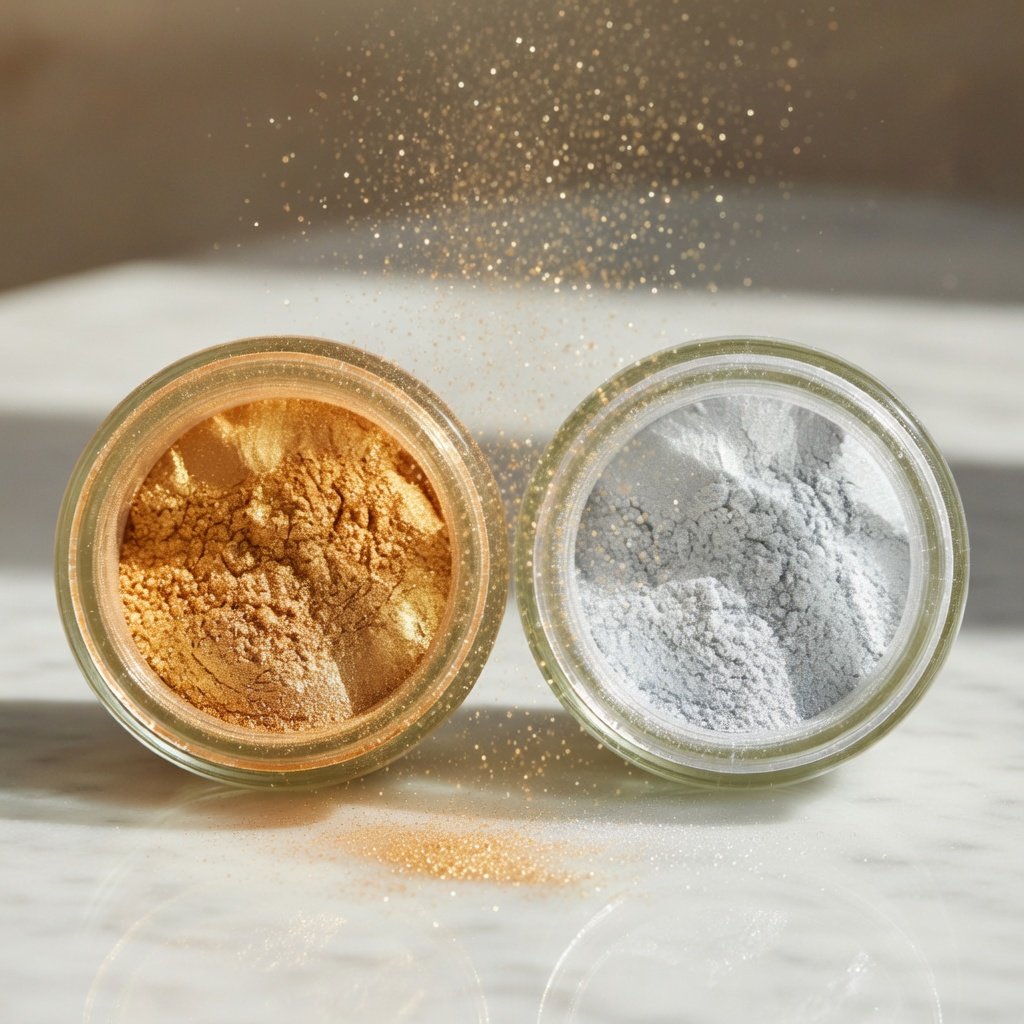
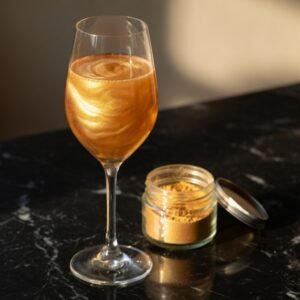
Gold Luster Dust is the wildcard here, and honestly our favorite for the night as a whole. It’s festive without being specific to any one color scheme, it photographs beautifully, and it works in literally everything — tequila, mezcal, beer cocktails, sparkling agua fresca. Gold just works.

Orange Luster Dust gets underused at this holiday and it shouldn’t. Tequila sunrise, palomas, anything with mango — orange glitter in an orange-forward drink looks like the drink itself is glowing. Try it once and you’ll understand.

The Technique (Don’t Skip This)

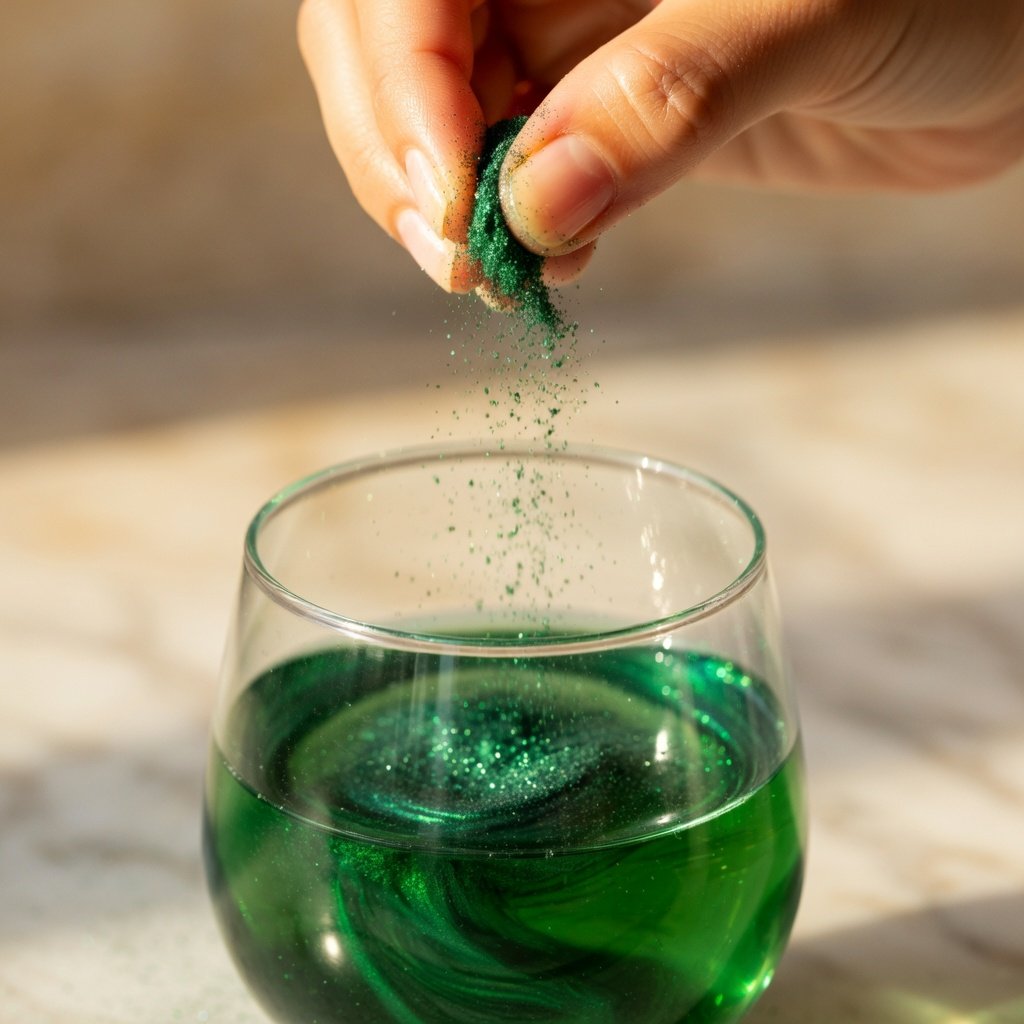
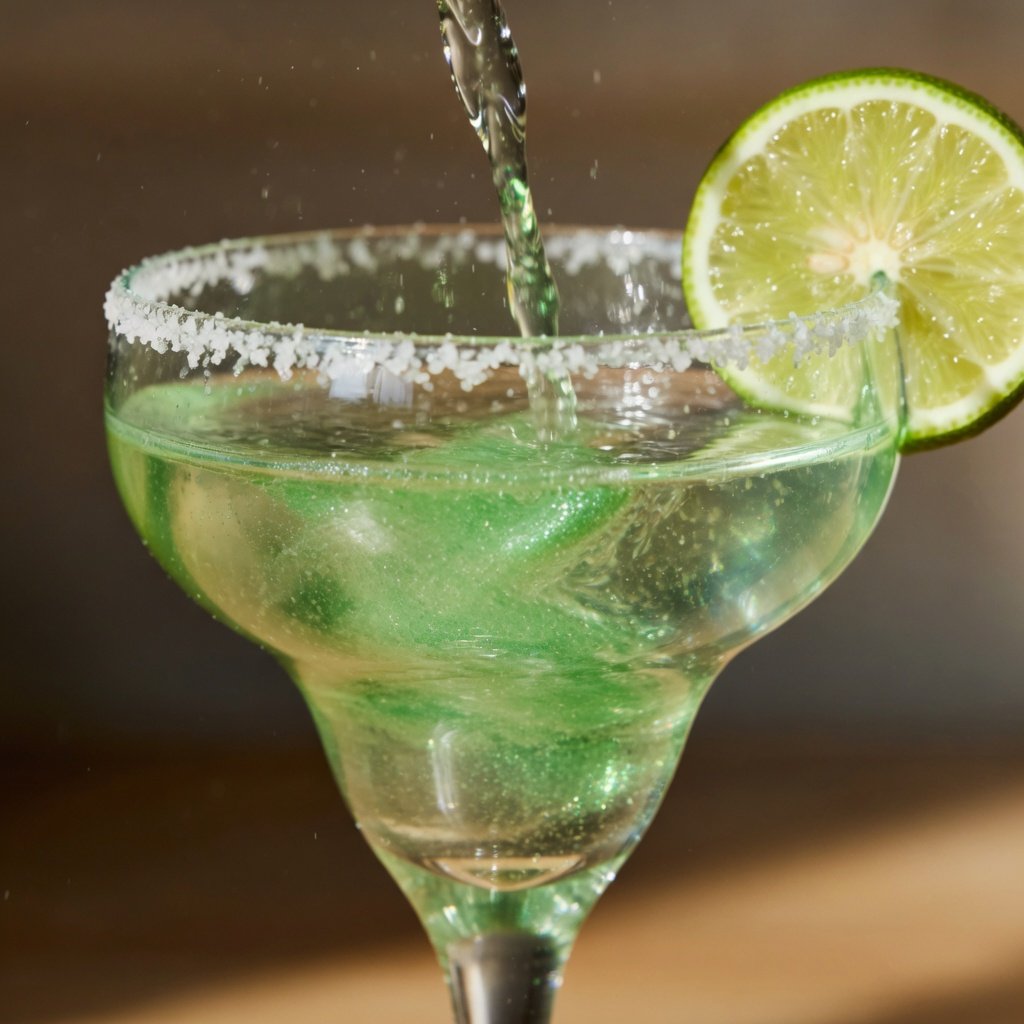
The biggest mistake people make is adding glitter after they’ve poured the drink. By then, everything settles at the top or clumps near the ice. You lose the suspended shimmer effect, which is the whole point.

The right way: add your pinch of glitter to the empty glass first. Pour the drink on top. The pour creates movement that distributes the particles through the liquid, and you get that swirling shimmer that keeps going every time the drink gets picked up or swirled. More on this in our full guide to using edible glitter in drinks.

How much? Around 1/8 teaspoon per glass. Seriously, that’s enough. More doesn’t mean more shimmer — it means a cloudy drink and wasted product. Start small, see how it looks, add a tiny bit more if you want. You’ll almost never need to.

Green edible glitter cocktail mid-pour in a margarita glass with glitter particles swirling through tequila and citrus liquid
Watch green edible glitter swirl through every pour for a Cinco de Mayo margarita that truly dazzles.

Three Drinks Worth Making

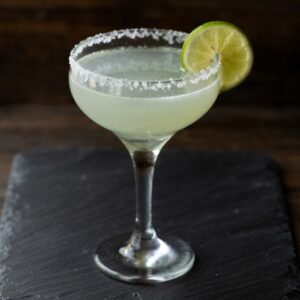
The Green Shimmer Margarita

Classic recipe, one addition. Add 1/8 tsp of light green luster dust to your glass before you pour. Salt rim optional — if you do it, use a coarse flake salt rather than table salt. The texture contrast with the smooth shimmer looks better, and the larger crystals don’t compete visually.

For the drink: 2 oz blanco tequila, 3/4 oz fresh lime juice, 1/2 oz triple sec, 1/2 oz simple syrup. Shake hard with ice, pour over rocks into the prepped glass. The shimmer will distribute on the pour and keep moving as the ice shifts. It’s a genuinely beautiful drink to watch.

We did a silver version of this last year — if you want a more dramatic, nighttime-party look, our Silver Shimmer Margarita recipe is worth checking out. But for Cinco de Mayo specifically, green and gold feel more right.

Gold Paloma

The paloma is underrated at every party it shows up to. Tequila, fresh grapefruit juice, a splash of grapefruit soda, lime. It’s lighter and more refreshing than a margarita and it’s wildly easy to batch for a crowd.

Gold glitter is perfect here. Add 1/8 tsp gold luster dust to each glass, pour the paloma over it, and garnish with a grapefruit wedge. The gold shimmer against the blush-pink color of the drink is one of those combinations that looks like you put way more effort in than you did. Batch a pitcher of the base and keep the dusted glasses ready — this is the move for a group of 10 or more.

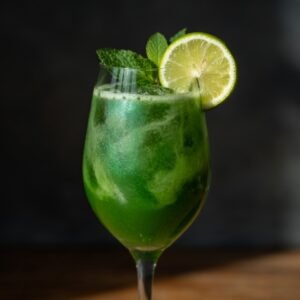
Mango Orange Shimmer Punch

For something non-alcoholic, or for guests who aren’t drinking: mango juice, fresh lime, a little jalapeño simple syrup if you want heat, sparkling water. It hits every flavor note the holiday calls for — sweet, citrus, a little spice.

Orange luster dust in this one. It transforms what looks like a regular juice drink into something that gets questions. Serve it in a big glass pitcher or dispenser and let guests see the shimmer as it pours. Also works perfectly with our Green Potion Mocktail base if you want to do a full mocktail spread — swap the green glitter for orange and the flavor profile fits right into a Cinco de Mayo table.

Setting Up for a Party

If you’re making drinks for a group, pre-dust your glasses before guests arrive. Set out 12 to 15 glasses, add your pinch of glitter to each one, and you’re done. When it’s time to pour, the shimmer activates with the liquid. It takes maybe three minutes of prep and it looks like you planned a whole elaborate setup.

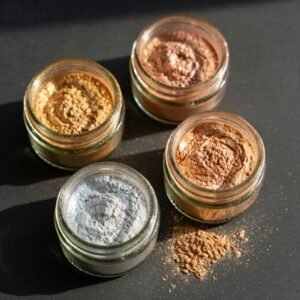
One jar handles more than you think — 10g gets you 80+ cocktails easily. Run multiple colors if you’ve got a full bar going. Green in the margarita glasses, gold in the highballs for palomas, orange in whatever you’re serving the mocktail in. Guests will notice, and some of them will ask where you got it.
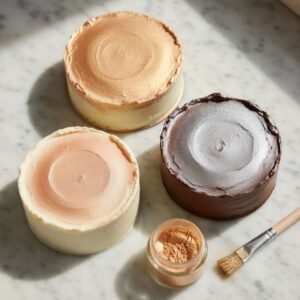
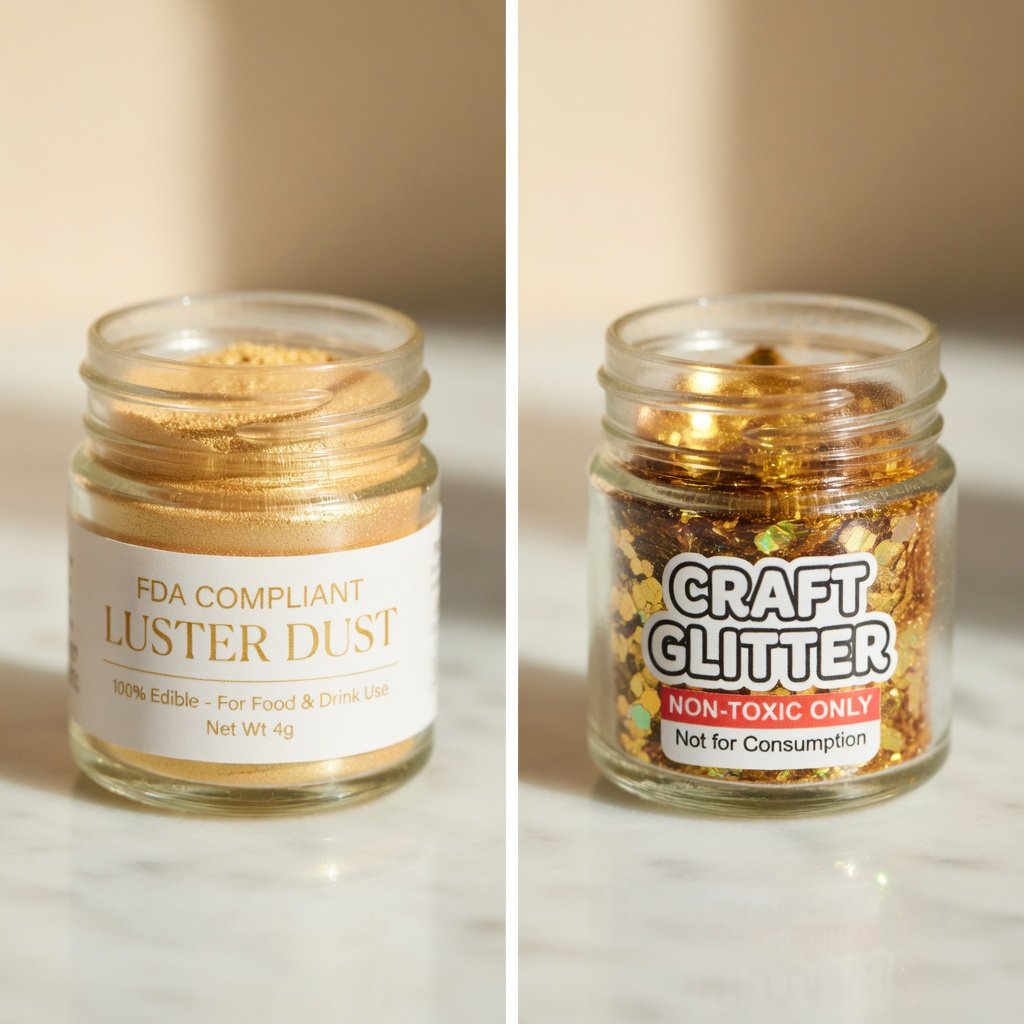
A Note on Quality

Not all glitter labeled “edible” actually is. A lot of what’s sold on Amazon and at craft stores is “non-toxic,” which just means it won’t send you to the hospital — not that it belongs in food. Our luster dust is FDA compliant, made from food-grade German mica pigments, and completely tasteless. It won’t change your drink at all, just the way it looks. If you’re curious about what’s actually in it, we broke that down here.

Make good drinks. Add shimmer. Cinco de Mayo’s a party — the glitter just makes it look like one.

Posted on Leave a comment

St. Patrick’s Day Green Glitter Recipes

Green edible glitter cocktails and mocktail for St. Patrick's Day with scattered luster dust and gold coins
Key Takeaways

– Green and light green luster dust both work for St. Patrick’s Day — use green for bold, deep shimmer and light green for something more subtle
– A pinch is all you need per drink. Seriously. Resist the urge to go heavy
– Gold pairs surprisingly well with green — it’s an underrated St. Patrick’s Day combo
– These recipes work for cocktails, mocktails, and food — covered below

St. Patrick’s Day Green Glitter Recipes

St. Patrick’s Day is one of the few holidays where going over the top with green is not only acceptable — it’s the whole point. And if you’re already committing to green drinks, green desserts, and green everything, you might as well make them shimmer.

We’ve been making these drinks for a few years now. Some flopped, some became regulars. Here’s what actually works.


Which Green to Use

We carry two greens: Green Luster Dust and Light Green Luster Dust. They’re not interchangeable — at least not if you care about the result.

Green is deep, rich, and dramatic. Drop it into a clear liquid and you get this emerald-tinged shimmer that catches light from across the room. It’s the one for cocktails, punch bowls, anything where you want impact.

Light Green reads more like spring — softer, almost minty. Better for lemonades, mocktails, or desserts where you don’t want the color to overwhelm everything else.

Both work for St. Patrick’s Day. It just depends on what you’re making.


The Drinks

1. Green Shimmer Whiskey Sour

This is our go-to. Whiskey sours already have that cloudy, frothy top from the egg white — the green glitter moving through the amber liquid underneath looks genuinely stunning. Two textures, two colors, one glass.

What you need:

  • 2 oz Irish whiskey
  • 3/4 oz fresh lemon juice
  • 1/2 oz simple syrup
  • 1 egg white (or aquafaba for vegan)
  • 1/8 tsp Green Luster Dust

Dry shake everything without ice first — that builds the foam. Add ice, shake again, strain into a coupe. Add the luster dust last, directly on top. Don’t stir. Let it settle into the foam and do its thing.

2. Shamrock Shimmer Margarita

Green margarita, but make it look like it belongs somewhere nice. The lime juice keeps the whole drink tart and bright, and the green glitter plays perfectly against the pale yellow of the liquid.

What you need:

  • 2 oz tequila blanco
  • 1 oz fresh lime juice
  • 3/4 oz triple sec
  • 1/4 oz agave nectar
  • 1/8 tsp Green Luster Dust
  • Green sugar for the rim (optional)

Shake with ice, strain over fresh ice in a rocks glass. Add the luster dust, give it one slow swirl with a bar spoon, and serve immediately. The shimmer dissipates if it sits too long, so hand it off fast.

If you want a full tutorial on getting glitter into drinks without it clumping or sinking wrong, our guide on using edible glitter in drinks covers all of it.

3. Green Potion Mocktail

This one’s built for the non-drinkers at your party — and honestly, it might get more attention than the cocktails. Lime, mint, a little sparkle. The light green luster dust keeps it feeling fresh instead of intense.

We already have the full recipe: Green Potion Mocktail. Use Light Green Luster Dust for this one.

Green edible glitter in cocktail glass as hand drops a pinch of luster dust, sparkling as it falls into the drink
Just a pinch of green edible glitter in your cocktail transforms any drink into St. Patrick's Day magic.

4. Gold Guinness Float

Stay with us here. Guinness, a small scoop of vanilla ice cream, and a dusting of Gold Luster Dust over the foam. The gold against the dark stout looks incredible — way better than green would. That rich gold shimmer on a pint of Guinness is distinctly St. Patrick’s Day without being gimmicky.

What you need:

  • 1 pint Guinness stout
  • 1 small scoop vanilla ice cream
  • 1/16 tsp Gold Luster Dust (light touch — just a dusting)

Pour the Guinness, let it settle fully. Add the ice cream scoop on top of the foam. Pinch the gold dust and tap it lightly over the ice cream. Serve before the ice cream melts. That’s it.


The Food

Green Shimmer Cupcakes

Chocolate or vanilla cupcakes with white or cream cheese frosting. Dust light green over the frosting right before serving — earlier than that and the moisture from the frosting can dull the shimmer a bit. Use a dry brush and tap it gently from about 6 inches above. You get this soft, even coverage that looks professional without much effort.

For more detail on applying luster dust to baked goods, we wrote a full breakdown on using edible glitter on cakes, cupcakes, and cookies.

Gold-Dusted Chocolate Coins

The easy one. Melt dark chocolate, pour into small circle molds, let set. Dust the tops with gold luster dust while still slightly tacky, or use a tiny bit of vodka as a carrier to paint it on once fully set. They look like actual coins. People genuinely pick them up thinking they’re wrapped in foil.


A Few Tips Before St. Patrick’s Day

Green edible glitter shows up best in clear or lightly colored liquids — think sparkling water, tonic, lemonade, light-colored spirits. In dark liquids like Guinness or whiskey, you lose most of the color, which is why we went gold on the float. Match your glitter to the base, not just the holiday palette.

And please don’t overdo it. 1/8 teaspoon per drink is the ceiling. More than that and your cocktail stops looking magical and starts looking like a kindergarten craft project. The shimmer works because it’s unexpected — keep it that way.

Last thing: order before the week of March 17th. We ship fast, but St. Patrick’s Day is a real rush and we’d hate for your glitter to arrive March 18th.


Posted on Leave a comment

Holiday Baking with Edible Glitter: Christmas & Beyond

Edible glitter for cakes and cookies: overhead flat lay of Christmas sugar cookies, layer cake, and chocolate truffles dusted with red, green, gold, and silver luster dust on a dark surface with pine sprigs
Key Takeaways

• Red and green luster dust on sugar cookies is the fastest way to make your holiday baking look genuinely impressive
• Gold on dark chocolate and silver on white frosting — these two combinations hit every time
• A dry brush gives you control; wet mixing gives you intensity. Know which one you need before you start
• White luster dust isn’t just filler — on snowy scene cakes and meringues, it’s the whole look

Holiday Baking with Edible Glitter: Christmas & Beyond

December is the one month where you can go completely over the top with edible glitter for cakes and cookies and nobody will say a word. The bar is already high. Everyone’s already expecting something spectacular. Use that.

Here’s what actually works — not just theoretically, but in practice, on real holiday bakes, under kitchen lighting that isn’t a professional photo studio.

The Colors That Actually Matter for the Holidays

You don’t need every color. You need the right ones. For Christmas, four colors cover almost everything: red, green, gold, and silver. White earns a spot if you’re doing winter-themed work. Blue comes in for Hanukkah and those icy winter wonderland cakes that are genuinely stunning when done right.

Red Luster Dust is the workhorse of holiday baking. Deep, rich, catches light beautifully on both light and dark surfaces. Green Luster Dust runs a close second — especially on fondant decorations like holly leaves, where the shimmer makes them look almost three-dimensional. Gold Luster Dust goes on basically everything. And Silver Luster Dust is criminally underused in holiday baking — more on that in a minute.

Sugar Cookies: The Highest-Impact Application

If you’re only doing one thing with edible cookie glitter this holiday season, make it this: dust luster dust directly over royal icing before it fully sets. Not wet, not bone dry. That in-between stage — tacky but not sticky — is the sweet spot. The glitter adheres evenly and the color comes out vivid.

Red on a white-iced stocking. Green on a Christmas tree. Gold on a star. You can do all of these with one brush and three jars, and your cookies will look like they came from a bakery that charges $5 each. The technique takes about 30 seconds per cookie once you get the hang of it.

One thing people get wrong: they wait until the icing is completely dry and then wonder why the glitter won’t stick. Dry icing needs a different approach — either dust immediately (while wet, which can cause bleeding), hit that tacky window, or use a tiny amount of clear extract on a brush to press the glitter into set icing. The last method works, but it takes longer. The tacky window is just easier.

For more on technique — dusting vs. painting vs. mixing into frosting — the full breakdown is in our guide to using edible glitter on cakes, cupcakes, and cookies. Worth reading before you start a big holiday batch.

Cakes: Go Big or Go Subtle — Both Work

Holiday cakes fall into two camps. The first is bold and maximalist: dramatic tiers, lots of color, the kind of cake that gets photographed and shared. The second is quietly elegant: simple flavors, restrained decoration, where the glitter is a finishing touch rather than the whole statement. Luster dust is perfect for both.

For bold cakes: Red and green dusted onto white buttercream creates a holiday palette that looks intentional and polished. Try dusting in sections rather than all over — a stripe of red on one side, green on the other, gold on the top edge where they meet. The contrast is really good.

For elegant cakes: Gold on a naked cake with exposed layers is quietly stunning. Just a light dusting on the top and edges. Same with silver on a smooth white fondant finish — it picks up the light differently depending on the angle, which is the whole point of mica-based glitter. It moves. Flat paint doesn’t do that.

Dark chocolate cakes deserve special mention. Gold Luster Dust on a dark chocolate ganache finish looks genuinely expensive. Silver on dark chocolate is even better — the contrast is sharper. We tested both at different times and the silver version consistently gets more comments. It looks like something from a high-end patisserie.

The Silver Conversation

Silver gets overlooked every holiday season and it shouldn’t. Silver Luster Dust on white or ivory buttercream creates this cool, icy effect that’s perfect for winter-themed cakes. Snowflake cookies dusted in silver look better than the same cookies in white. Chocolate truffles with a thin brush of silver look like they cost $15 each.

Also: silver and gold together. Not evenly mixed — layered. A base dusting of gold with silver brushed lightly over the top catches light at different angles and gives you depth that neither color achieves alone. Try it on the top of a Yule log cake. You’ll use that trick forever.

White Luster Dust: The Underdog of Holiday Baking

White Luster Dust looks subtle in the jar. On the right surface, it’s anything but. Dust it over white royal icing and you get this fresh-snow shimmer that’s genuinely beautiful. Brush it onto meringue mushrooms and they look like they grew in an actual forest. Use it on a snowy scene cake and suddenly those fondant drifts have depth instead of just looking like white frosting.

The key is surface contrast. White on white doesn’t disappear — the pearlescent quality of the mica still creates shimmer — but it’s subtle. White on a light blue fondant pops more. White on dark surfaces creates a frost effect. Know what you’re going for before you start.

Hanukkah and Winter Cakes: Blue and Silver

Blue luster dust is genuinely beautiful on white or cream backgrounds. Blue Luster Dust combined with silver creates a color palette that works for Hanukkah but also just for any winter-themed bake where the warm red-and-green Christmas palette doesn’t fit.

Blue dusted sugar cookies with silver stars. A white layer cake with blue and silver gradient brushwork on the outside. Blue and white marbled fondant accents with a silver shimmer. These combinations photograph beautifully and taste exactly the same as everything else — which is the whole point. Luster dust is completely tasteless. It’s all visual.

Practical Tips for Holiday Baking Season

A few things that save time when you’re in the middle of a big baking push:

  • Use a dedicated brush for each color. Cross-contamination ruins reds (they go muddy) and silvers (they go greenish). Label your brushes or get different sizes for different colors so you know which is which.
  • Start with less than you think you need. 1/8 teaspoon covers more surface area than you’d expect. You can always add more; you can’t take it back.
  • Work with a clean, dry brush for dusting. If you’re painting (mixing with extract or alcohol), use a smaller, stiffer brush for control.
  • For large batches of cookies, set up a station: icing first, then glitter dusting as each cookie hits that tacky stage. Don’t try to glitter ice-cold fully-set cookies — you’ll fight it the whole time.

What Not to Do

Honestly, the biggest mistake in holiday baking with edible glitter is overdoing every single element. Glitter works best as contrast. If every surface of a cake is coated in heavy glitter, the eye doesn’t know where to land. Pick your moments.

The second mistake is using craft glitter because “it looks the same.” It doesn’t taste the same. It’s not food. If a product says “non-toxic” rather than “edible” or “FDA compliant,” it should not be in food — full stop. Everything in our line is made with FDA compliant German mica pigments, vegan, gluten-free, completely tasteless. That’s the baseline you should expect from anything you put on a cake.

The Combinations Worth Remembering

After a lot of holiday baking, these are the pairings that consistently deliver:

  • Red on white buttercream. Classic. Vivid. Exactly what you think it is, and it works.
  • Gold on dark chocolate ganache. Looks expensive. Requires almost no effort.
  • Silver on white fondant. Icy, elegant, gets more comments than you’d expect.
  • Green on ivory buttercream. Warmer than green on white. More sophisticated feel.
  • Blue and silver together on anything white. Winter and Hanukkah in one palette.
  • White on meringue. Transforms something simple into something beautiful.

The holidays are already a lot. Luster dust is one of the few baking upgrades that takes almost no time and makes a disproportionate difference. A 10-second dust on a finished cookie changes the whole look. Trust that.


Posted on Leave a comment

Wedding Edible Glitter Trends 2026

Gold edible glitter and rose gold luster dust jars styled on a wedding table beside a shimmering champagne flute with white florals
Key Takeaways

– Gold is still the dominant wedding color for 2026 — but the tone has shifted toward warmer, antique-style gold rather than bright metallic
– Rose gold is moving from cake decoration onto cocktail rims and glitter bars, making it one of the most versatile wedding trends right now
– Glitter cocktail stations and shimmer welcome drinks are replacing static cake displays as the edible glitter moment of the reception
– White luster dust is underrated for weddings — brushed onto white fondant, it creates a luminous finish that photographs beautifully without color

Wedding Edible Glitter Trends 2026

Weddings in 2026 are going all in on shimmer. Not the gaudy, too-much-of-everything kind — the intentional kind. A dusting of gold on a cake tier. A rose gold rim on the signature cocktail glass. Shimmer in the welcome drink that catches the venue lighting before guests even find their seats.

We’ve been watching what planners, bakers, and bartenders are ordering heading into this wedding season, and the patterns are pretty clear. Here’s what’s actually trending — and how to pull it off.


Gold Is Staying. The Shade Is Shifting.

Gold isn’t going anywhere. Gold Luster Dust has been our top seller for years, and 2026 isn’t the year that changes. But the aesthetic around it is evolving.

Bright, flashy gold — the kind that reads almost yellow — is getting replaced by something warmer and more muted. Think antique gold. Aged gold. The kind of shimmer you see on old picture frames or candlelight hitting a brass fixture. Our German mica pigments hit that note naturally. The depth in the color is why gold luster dust looks so different from cheap craft glitter — it reflects rather than just shines.

How couples are using it in 2026:

  • Brushed onto the top tier of the wedding cake with a dry pastry brush — light handed, not fully coated
  • Dropped into champagne flutes for the toast (1/8 teaspoon per glass, nothing more)
  • Dusted over chocolate truffles passed on trays during cocktail hour
  • Mixed into honey or simple syrup for signature cocktails that shimmer from the inside

The toast moment especially. Drop gold luster dust into champagne right before guests pick up their glasses and the shimmer moves with the bubbles. The whole room notices. It’s a five-second addition that makes the moment feel designed.


Rose Gold Is Everywhere — And It’s Moved Off the Cake

A few years ago, rose gold luster dust lived almost exclusively on fondant. It was a cake color, full stop. That’s changed.

Rose Gold Luster Dust is showing up on cocktail rims, stirred into prosecco, dusted onto macarons, pressed onto the edges of sugar cookies at escort card tables. It’s become a palette color, not just a cake accent. And it makes sense — rose gold sits in this warm pink-to-copper range that photographs incredibly well, especially in evening light.

The cocktail application is the one we’re most excited about. A rose gold prosecco spritz for the bridal party pre-ceremony? That’s a moment. We put the recipe together if you want the exact ratios — Rose Gold Prosecco Spritz is genuinely one of our favorites and it takes about two minutes to make per glass.

Brides with blush, dusty rose, or terracotta palettes should strongly consider making rose gold the throughline across every edible element — cake, cocktails, and passed desserts. It reads cohesive without being obvious.

Rose gold luster dust cocktail rim on a champagne coupe with white florals and soft bokeh at a wedding reception
A rose gold luster dust cocktail rim turns a simple champagne coupe into a statement piece at any wedding reception.

The Glitter Bar Trend

This one has been building for two years and it’s hitting critical mass in 2026. Instead of a single glitter moment, couples are setting up dedicated shimmer stations — usually during cocktail hour — where guests can watch drinks get made with luster dust added to order.

It’s interactive, it photographs well, and it genuinely delights people who’ve never seen edible glitter up close. The bartender drops a pinch of gold into a flute, swirls it once, and hands it over. Guests go wide-eyed every time.

For planners and couples building a glitter bar setup, here’s what actually works:

  • Three colors maximum — gold, rose gold, and silver gives you enough range without decision paralysis
  • Small labeled jars on the bar so guests can see the colors before ordering
  • A simple, consistent swirl technique — train your bartender once, it takes five minutes
  • Glitter rimmed glasses as a static option for guests who want shimmer without the theater

The rimmed glass approach is underrated, especially for cocktail hour when service volume is high and bartenders don’t have time to dust individual drinks. Pre-rim the glasses. Guests pick them up and they’re already glittering. Our Glitter Rimmed Cocktail Glasses tutorial shows exactly how to do this without making a mess.


White Luster Dust: The Underrated One

Photographers are the ones who pushed us onto this, honestly. We started noticing White Luster Dust orders spiking in the months before wedding season, and when we dug into it, the feedback was consistent: white on white photographs beautifully.

Brush white luster dust onto white fondant and you get this luminous, pearl-like finish that the camera catches differently depending on the angle. There’s no color added — just light. For couples going for a clean, elegant aesthetic without obvious metallic, it’s perfect. The shimmer reads as texture more than glitter, which some people strongly prefer.

White also works on sugar-coated almonds (the traditional wedding favor gets a serious upgrade), on white chocolate bark, and pressed lightly onto cream cheese frosting. The frosting application is surprisingly good — the surface grabs the dust just enough to hold it without blending it in.


Silver Is Back for Evening Receptions

Silver had a moment in the early 2020s and then kind of receded while rose gold took over. It’s coming back, specifically for evening receptions and black-tie weddings.

Silver Luster Dust on dark chocolate is something else. We keep saying this and we’ll keep saying it. A dark chocolate ganache cake dusted with silver looks absurdly expensive. Add dim reception lighting and candles on the table and the whole thing glows. It’s the kind of cake that gets photographed by every guest who walks past the cake table.

Silver also works paired with gold — gold on the cake, silver rimming the cocktail glasses, for example. Mixing the two metals used to feel wrong; in 2026 it reads modern. The key is keeping one dominant and one as an accent, not splitting them 50/50.


Quick Summary: Which Color for Which Aesthetic

If you’re trying to match luster dust to a wedding palette and don’t want to overthink it:

  • Classic / timeless / all-white: Gold or white luster dust
  • Romantic / blush / terracotta: Rose gold, full stop
  • Modern / minimalist / black-tie: Silver, or silver with a single gold accent
  • Maximalist / eclectic / colorful: Gold as the anchor — it plays well with everything
  • Garden / boho / earthy: Rose gold or gold, dry brushed rather than full-coated

All four colors are FDA compliant, vegan, and completely tasteless. They work on every surface — fondant, buttercream, chocolate, drinks, fruit. Order a 10g jar of each and you’ll have enough for a full wedding’s worth of edible moments without running out.

Weddings are one of the few times edible glitter makes complete sense for every course. Use it.

Posted on Leave a comment

Valentine’s Day Shimmer Desserts

Red edible glitter dusted over valentine's day cupcakes, truffles, and heart cookies with pink edible glitter accents and an open jar of Luster Dust
Key Takeaways

– Red and pink edible glitter are the move for Valentine’s Day — on truffles, cupcakes, cookies, and cocktails
– Red luster dust hits different on dark chocolate — the contrast makes it look expensive without much effort
– Rose gold is the underrated Valentine’s color: warmer than pink, more romantic than gold
– A little goes a long way — 1/8 tsp is enough to shimmer an entire batch of truffles

Valentine’s Day Shimmer Desserts

Valentine’s Day desserts live or die on presentation. The taste matters, obviously — but that first moment when someone sees what you made? That’s the whole game. Red edible glitter on a dark chocolate truffle, pink shimmer brushed across a sugar cookie, rose gold dusted on a cupcake tower. It takes about 30 extra seconds and it’s the difference between “these look good” and pulling out their phone to take a picture.

Here’s how to actually use luster dust for Valentine’s Day — not just which colors to buy, but where they work best and how to apply them so the shimmer lands right.

The Valentine’s Color Lineup

Four colors carry the whole holiday. You don’t need all of them, but knowing what each one does helps you pick the right one for your project.

Red Luster Dust is the obvious choice and also genuinely the best choice for the right surfaces. It’s bold. Dramatic. On dark chocolate especially, it catches light like a jewel — deep red shimmer against brown is one of those combinations that shouldn’t work as well as it does. On lighter surfaces, red can read a little intense, so keep that in mind.

Pink Luster Dust is softer and more versatile. Works beautifully on buttercream, white chocolate, sugar cookies, and vanilla anything. The shimmer is still there — it’s not subtle — but it feels lighter than red. Good for when you want the “Valentine’s” vibe without going full dramatic.

Rose Gold Luster Dust is the one people don’t think to reach for, and that’s a mistake. It’s warmer than pink, more romantic than straight gold, and it photographs absurdly well. Drop it in a glass of prosecco and the shimmer has this peachy-gold glow that reads “luxury” even if the drink cost you $12 a bottle. (Speaking of which — the [Rose Gold Prosecco Spritz](https://lusterdust.com/recipe/rose-gold-prosecco-spritz/) is already on the site and it’s a great Valentine’s option.)

Gold Luster Dust rounds it out for anything you want to feel expensive and celebratory. Not as romantic as rose gold on its own, but paired with red on a dessert board — alternating truffles, some red shimmer, some gold — it’s striking.

Where Each Color Works Best

This is the part nobody talks about enough. The color you choose matters less than the surface you’re putting it on. Luster dust doesn’t just sit on food — it interacts with the texture and color underneath.

Dark chocolate truffles: Red, full stop. The contrast between deep brown chocolate and red shimmer is unreal. Dust them just before serving — they’ll catch the light every time someone moves the plate.

Buttercream frosting: Pink is the winner here. Buttercream has that slightly glossy, smooth surface that lets the shimmer really show up. Red on pale buttercream can look a little muddy depending on your frosting color; pink stays clean and bright.

White chocolate bark or dipped strawberries: Rose gold. White and pale surfaces let the warm pink-gold tone come through properly. It’s one of those things where the final result looks like you put way more effort in than you actually did.

Sugar cookies: Pink or rose gold on royal icing, depending on your base color. For red-iced cookies, a dusting of red luster dust on top deepens the color and adds dimension — it goes from flat red to something that actually glows.

Prosecco or champagne: Rose gold for Valentine’s Day, without question. Gold works too, but the rose gold tone is warmer and more fitting for the occasion. A pinch per glass, dropped in before you pour.

Red edible glitter on chocolate truffles dusted with Luster Dust, displayed on marble with rose petals and a jar of pink edible glitter
Each truffle gets its Valentine's Day glow from red edible glitter dusted on with Luster Dust.

How to Apply It — The Basics

If you’re new to luster dust, the detailed rundown lives in our post on [how to use edible glitter on cakes, cupcakes, and cookies](https://lusterdust.com/how-to-use-edible-glitter-on-cakes-cupcakes-cookies/). But here’s the quick version for Valentine’s desserts specifically.

Dry dusting is the easiest method. Take a clean, dry food-safe brush — a wide, soft one works better than a small detail brush for most desserts. Dip lightly into the jar, tap off the excess on the back of your hand, then brush across your dessert with a light touch. Build it up if you want more intensity. You can always add; you can’t take away.

Rolling works great for truffles and round things. Pour a tiny amount — seriously, 1/8 tsp — into a small bowl, place your truffle in it, and give a gentle roll. The shimmer coats the surface evenly and you get full coverage without brush marks.

For drinks, just drop a pinch directly into the glass. Give it a gentle swirl. Don’t stir aggressively — that disperses the particles too much and you lose the shimmering suspension effect. The glitter should move through the liquid on its own.

One thing that trips people up: they use too much. Red luster dust in particular — a little creates that rich shimmer, a lot creates a thick coating that dulls the effect. The goal is shimmer, not paint.

A Few Specific Ideas Worth Trying

These aren’t full recipes, just combinations that work well and are fast to pull together.

Red shimmer hot cocoa: Make your cocoa, top with whipped cream, dust red luster dust over the cream. The shimmer catches in the steam. It’s the most low-effort Valentine’s dessert drink possible and it looks ridiculous in the best way.

Pink glitter cake pops: Dip in white chocolate, let set, then brush pink luster dust over the top half. The two-tone shimmer effect — bright at the top, fading down — is really pretty and takes about 90 extra seconds.

Champagne with rose gold and red: Drop a pinch of rose gold into the glass first, then a tiny pinch of red on top. They layer as they settle. The effect is basically a Valentine’s sunrise in a flute.

Chocolate-dipped strawberries with gold: Dark chocolate dip, let set, then dust gold across the tips. Simple. Looks like something from a hotel gift shop. Takes 30 seconds.

How Much Do You Need?

More than you’d think for the jar size, less than you’d think per use. A 10g jar of red luster dust will coat somewhere around 40-50 truffles with a generous dusting, or 80+ if you’re being sensible about it. For a Valentine’s Day dessert spread — a batch of truffles, a dozen cookies, a couple of cocktails — one jar handles everything with plenty to spare.

If you’re doing a big event or want to go all-in on multiple colors, free shipping kicks in at $50, so picking up red, pink, and rose gold together makes sense.

Red glitter on dark chocolate, pink shimmer on buttercream, rose gold in prosecco. That’s genuinely all you need for a Valentine’s Day table that looks like you spent hours on it. You didn’t spend hours on it. That’s the whole point.


Posted on Leave a comment

Halloween Edible Glitter Ideas: Spooky Treats That Shimmer

Black edible glitter cupcakes and purple luster dust truffles with shimmer cake pops on dark slate for Halloween
Key Takeaways

– Black isn’t in our catalog, but purple, orange, green, and silver do all the heavy Halloween lifting
– Silver on dark chocolate looks expensive and borderline unsettling — perfect for the holiday
– Green luster dust in drinks is genuinely eerie. We have a whole mocktail recipe built around it.
– A 10g jar covers more than you’d think — enough for cupcakes, cookies, and drinks for a full party

Halloween Is the Best Holiday for Edible Glitter. It’s Not Close.

Every other holiday, you’re trying to make things look pretty. Halloween, you’re trying to make them look a little wrong. A little too shiny. Like something you’d find in a witch’s kitchen. Edible glitter is perfect for this.

People search for black edible glitter every October, and we get it — black shimmer on a dark chocolate truffle sounds incredible. We’ll be honest with you: we don’t carry black. But here’s the thing. Purple, silver, orange, and green will do more for your Halloween table than black ever could. Black just disappears. These colors make things glow.

Here’s how to use each one.

Purple: The One You Actually Want

Purple Luster Dust

Purple is doing the most work on this list. Deep, slightly eerie, and it catches light in a way that reads as genuinely magical — the good kind of magical, like something cursed.

Dust it on dark chocolate cupcakes with black buttercream and the purple shimmer sits right at the edge of the frosting like a bruise catching the light. It sounds weird. It looks incredible. You can also mix a small amount into purple buttercream before piping — about 1/4 teaspoon per cup of frosting gets you full shimmer coverage without muddying the color.

For drinks, a pinch of purple in a blackberry cocktail or dark grape juice is genuinely unsettling in the best possible way. The particles swirl through the dark liquid and disappear and reappear as the glass moves. Your guests will stare at it.

Orange: Underrated and Actually Halloween-Accurate

Orange Luster Dust

Orange gets dismissed as “too obvious” for Halloween, and that’s a mistake. The shimmer completely transforms it from basic pumpkin décor territory into something that looks like actual magic.

Try this: mix 1/8 teaspoon of orange luster dust into warm simple syrup, let it cool, then use it as a drizzle over white chocolate bark. The orange shimmer on white chocolate looks like molten amber. It’s also perfect for dusting the tops of pumpkin-shaped sugar cookies — the metallic finish makes the orange frosting look like hammered copper instead of craft store decor.

Orange in cider. Pinch in a glass of spiced apple cider, warm or cold, and the shimmer floats at the surface. That’s it. That’s the move.

Green: Built for Halloween Drinks

Green Luster Dust

We made a [Green Potion Mocktail](https://lusterdust.com/recipe/green-potion-mocktail/) specifically because green luster dust in a drink looks like something out of a cauldron. Lime green liquid with shimmer moving through it hits different than any other color we’ve used in drinks.

On desserts, green works best on darker backgrounds. Black fondant with green shimmer dusted across it looks like something is glowing from underneath — exactly the vibe you want for a Halloween cake. Don’t overdo it. A light pass with a dry brush gives you that barely-there phosphorescent effect. Heavy-handed and it starts to look like craft glitter, which is the opposite of what you want.

Pretzel rods dipped in dark chocolate and dusted with green luster dust are a five-minute project that looks like you tried way harder than you did. Good for school parties. Good for the office. Good for eating alone, honestly.

Silver: Looks Expensive, Looks Eerie

Silver Luster Dust

Silver on dark chocolate is a whole thing. We’ve said it before and we’ll say it again — it looks absurdly expensive, like something from a high-end chocolatier. For Halloween, that same quality reads as unsettling. Like, why is this truffle shimmering? It’s perfect.

Skull-shaped chocolates dusted in silver look like actual metal. Matte black frosting with a light silver dusting over the top catches light like storm clouds. Meringue ghosts — those little piped white meringue cookies everyone makes — go from cute to genuinely strange when you dust them with silver. They look less like decoration and more like something that moved when you weren’t looking.

Silver also works in drinks. A silver-rimmed glass for a Halloween cocktail is an easy upgrade — brush a little luster dust mixed with vodka or clear extract around the rim and let it dry. The technique is the same as we lay out in our guide on [how to use edible glitter on cakes, cupcakes, and cookies](https://lusterdust.com/how-to-use-edible-glitter-on-cakes-cupcakes-cookies/) — dry dusting, wet painting, or mixing in. Same rules apply to glitter rims.

A Few Quick Ideas If You’re Short on Time

Store-bought goods can look legitimately impressive with thirty seconds of effort. Some fast options:

– Grocery store chocolate cupcakes + purple luster dust dusted on top with a dry brush = done
– Boxed brownie bites rolled in orange luster dust while still slightly warm — they look like they came from a Halloween specialty shop
– Black licorice wheels brushed with silver luster dust. Cursed-looking in the best way.
– Pre-made sugar skull cookies dusted with purple and orange together — the color gradient happens naturally when you apply them light-handed
– Any dark cocktail with a pinch of silver swirled in. Halloween party drinks should shimmer.

One Thing to Know Before You Buy

If you’ve been searching for black edible glitter and ended up here, check the labels on whatever you find elsewhere. A lot of Halloween-themed glitter products that show up on Amazon or in craft stores are labeled “non-toxic” but not actually food-grade. Non-toxic means it won’t hurt you if you accidentally eat some. Edible means it’s made from FDA compliant ingredients designed to be consumed. Big difference — and it’s worth knowing before you put something on food you’re serving to kids.

Our luster dust is FDA compliant, made with German mica pigments, vegan, gluten-free, and completely tasteless. If you want more on the safety side of things, we broke it all down in [this post on whether edible glitter is actually safe](https://lusterdust.com/is-edible-glitter-actually-safe-everything-you-need-to-know/).

The Honest Take on Black Edible Glitter

Black shimmer sounds dramatic, but in practice, it reads as gray and tends to disappear against dark food. Purple does everything you’re hoping black will do, but better — it shows up, it shimmers, and it looks like it belongs in a spell. Pair it with silver for the full effect.

Halloween is the one time of year where more dramatic is almost always better. Don’t hold back.


Posted on Leave a comment

Edible Glitter for Drinks Near Me: Why Online Is Better

Person searching for edible glitter for drinks nearby on a phone next to a shimmering gold cocktail on a counter
Key Takeaways

• Most local stores — craft stores, grocery stores, party supply shops — carry very limited edible glitter, and what they stock is often mislabeled “non-toxic” rather than actually FDA compliant
• Online ordering gets you more colors, bigger jars, and genuinely food-safe products — usually delivered in 2-3 days
• A 10g jar makes 80+ shimmer drinks. You don’t need a local source. You need one good jar.
• If you actually need glitter today, we’ll tell you exactly where to look — and what to avoid on the shelf

You searched “edible glitter for drinks near me” because you need it soon and you don’t want to wait. Fair. But here’s the thing nobody tells you when you’re standing in the cake aisle at Michaels: most of what’s on that shelf wasn’t made for drinks. Some of it wasn’t made for eating at all.

Worth knowing before you buy the wrong thing.

What You’ll Actually Find at Local Stores

The usual suspects — Michaels, Hobby Lobby, Party City, some grocery stores — do carry sparkly products marketed as “edible glitter.” The selection is almost always the same: a few Wilton products, maybe a bulk-brand knockoff, tiny jars (3-4 grams), and a color range that tops out at gold, silver, and maybe a pink.

The bigger problem isn’t the selection. It’s the labeling. Flip a lot of those jars over and you’ll see “non-toxic” where you should see “FDA compliant.” Those are not the same thing. Non-toxic means it probably won’t hurt you. Edible means it’s actual food. For drinks specifically — where the glitter is fully suspended in liquid you’re drinking — you want the real thing. Full breakdown of why that distinction matters here, if you want it.

Specialty baking shops are a better bet than craft stores. If you have a local cake decorating supply store, they’re more likely to carry legitimately food-grade products. Call ahead. Ask specifically if it’s FDA compliant, not just “safe for food use.”

Why Online Just Works Better

This isn’t a knock on local stores — it’s just math. No brick-and-mortar shop is going to stock 13 colors of luster dust in three different jar sizes. They’d need a whole aisle. Online, you get the full range, the right quantities, and you can actually read the full ingredient list before you buy.

Our 10g jars run $9.98 and make somewhere around 80-100 drinks. For most people, one jar lasts months. The 50g jar makes more sense if you’re doing a party, a wedding bar, or you just plan to use it a lot. Either way, you’re not making multiple trips to a craft store hoping they restocked.

The colors we get asked about most for drinks:

  • Gold Luster Dust — the default. Works in champagne, prosecco, anything warm-toned. The shimmer in a flute is genuinely hard to look away from.
  • Silver Luster Dust — better in clear or dark liquors. Vodka cocktails, dark rum drinks, anything where gold would look muddy.
  • Rose Gold Luster Dust — the one people didn’t know they needed. Stunning in rosé, pink lemonade, spritz-style drinks. Looks warm without looking brassy.

All three are made with German mica pigments, completely tasteless, vegan and gluten-free, FDA compliant. The shimmer quality is different from what you’ll grab off a craft store shelf — not subtly different. Noticeably different.

If You Actually Need It Today

Okay, you have an event tonight. Here’s the honest rundown:


You’ll find something. Wilton makes a few products that are legitimately food-grade — look for their “Color Dust” line and read the label carefully. The jars are small and the shimmer is on the subtle side, but it’ll work in a pinch. Avoid anything that only says “non-toxic” without an FDA or food-grade designation.


How Much to Use (Because People Get This Wrong)

Less than you think. A pinch — about 1/8 teaspoon per glass — is plenty. Drop it in, give the glass a gentle swirl, and let it move. The shimmer comes from the particles catching light as they travel through the liquid. Dump in half a teaspoon and you get cloudy drinks, not more sparkle. There’s a full technique breakdown in our guide to using edible glitter in drinks — worth a quick read if this is your first time.

For a batch punch or pitcher, scale up slightly — about 1/2 teaspoon per gallon works well. The Cranberry Glitter Punch recipe shows exactly how to do this for a crowd. Gold in champagne is the classic move — the Gold Shimmer Champagne Cocktail takes about 30 seconds and looks like something from a high-end bar.


Posted on Leave a comment

New Year’s Eve Glitter Cocktails: 7 Recipes That Sparkle

Seven edible glitter cocktails glowing in gold, silver, and rose gold on dark marble for New Year's Eve
Key Takeaways

• A pinch — 1/8 tsp — is all you need per glass. More glitter just makes cloudy drinks.
• Gold, silver, and rose gold each do something different. Right color, right drink.
• All three shimmer beautifully in sparkling wine, but they don’t all work the same in spirits.
• These 7 recipes cover every NYE crowd: classic champagne toasts, craft cocktails, and a zero-proof option.

New Year’s Eve is the one night where putting edible glitter cocktails on the table isn’t extra — it’s just appropriate. The whole point is sparkle. So here are seven drinks worth making, each one using Gold Luster Dust, Silver Luster Dust, or Rose Gold Luster Dust in a way that actually makes sense.

Before anything else: the one rule that matters. A pinch per glass. That’s it. If you want to know exactly why, the full drink guide is here — but the short version is that luster dust shimmers when it moves through liquid. Too much and it clumps and clouds. Less is genuinely more.

1. Gold Shimmer Champagne

The obvious one. Gold in champagne is obvious because it works — the bubbles keep the dust suspended and every sip catches the light differently. Drop 1/8 tsp of gold into the flute before you pour, then pour slowly down the side of the glass. The shimmer activates as it fills.

We’ve made this dozens of times. Still gets a reaction every single time. Full recipe here.

2. Rose Gold Prosecco Spritz

Swap the champagne for prosecco, add a splash of Aperol, and go rose gold instead of yellow gold. The warm copper shimmer hits differently against that orange-pink color — it looks almost lit from within. This one photographs ridiculously well if that matters to you.

1/8 tsp of rose gold into the glass, then build the drink on top. Full recipe here.

3. Silver Martini

Silver gets slept on. Everyone reaches for gold automatically, but silver in a cold, clear martini is genuinely something else. It looks expensive in a way that’s hard to describe — like the drink itself is metallic. Classic gin or vodka martini, 1/8 tsp of silver dropped in, stirred gently once.

Serve it up in a chilled glass. The silver catches overhead light as it settles. Your guests will wonder if you bought these at a restaurant supply store.

4. Cranberry Glitter Punch

Making drinks for a crowd instead of individual cocktails? This is the move. Deep red cranberry base, a citrus splash, and gold or silver dust stirred in right before you ladle it out. The shimmer in a punch bowl looks dramatic in the best way — especially with a few cranberries and a sprig of rosemary floating on top.

The key is stirring the dust in at serving time, not when you make the punch. It’ll settle otherwise. Full recipe here.

Edible glitter for drinks being poured from a spoon into a sparkling prosecco flute by candlelight
A single spoonful of edible glitter for drinks transforms plain prosecco into a shimmering New Year's showstopper.

5. Gold Old Fashioned

This one surprised us the first time we made it. An old fashioned is a low-movement drink — no bubbles, no shaking — so the shimmer settles slowly and you get this deep, glowing amber situation in the glass. Almost like the bourbon itself is producing light.

Use a big ice cube and add the gold dust last, directly over the ice. Give it one gentle stir and leave it alone. Let it do its thing.

6. Silver Vodka Soda (The Easy One)

Not everyone wants a complicated cocktail at midnight. Vodka, soda water, a squeeze of lime, and 1/8 tsp of silver. That’s it. The carbonation keeps the dust moving for the first few minutes — which is when everyone’s paying attention anyway.

This is the one to make in batches if you have non-whiskey, non-wine drinkers at your party. Fast, crowd-proof, and the silver glitter is doing all the heavy lifting visually.

7. Rose Gold Sparkling Mocktail

Sparkling water, pomegranate juice, a little honey syrup, and rose gold dust. Zero alcohol, full shimmer. The pomegranate gives it this deep pink-red color that makes the rose gold really pop — it’s honestly one of the better-looking drinks on this list, with or without the glitter.

The people at your party who aren’t drinking don’t have to hold a boring club soda while everyone else has something gorgeous. This fixes that.


A Few Things Worth Knowing

All three — gold, silver, rose gold — are FDA compliant, made from food-grade German mica pigments. Tasteless, odorless, vegan, gluten-free. If you’re new to this stuff and want the full safety breakdown, we covered it thoroughly here.

The 10g jars will get you through NYE and then some. One jar is roughly 80 drinks at 1/8 tsp per glass. Unless you’re hosting a very large party, you’re not running out.

One more thing: glitter-rimmed glasses. Wet the rim, dip it in luster dust mixed with a tiny bit of coarse sugar, done. It’s a different effect from the shimmer-in-the-drink look — more theatrical, less subtle. How to do it here. Works especially well on the silver martini or the old fashioned.

Pick your colors, stock your bar, and have a good one.


Posted on Leave a comment

Rose Gold Luster Dust: The Trending Color for Weddings

Rose gold luster dust jar open on marble surrounded by shimmery macarons, prosecco flute, and blush dried roses
Key Takeaways

  • Rose gold luster dust works on everything — wedding cakes, champagne cocktails, macarons, chocolate truffles, and more
  • It’s made from FDA compliant, food-grade mica pigments — completely safe, tasteless, and vegan
  • A little goes a long way: 1/8 teaspoon per cocktail, a light brush for cakes
  • Pair it with our Pink for a softer look, or Gold for something warmer and more dramatic

Rose gold had its moment in the mid-2010s and never really left. It just got more refined. Now it’s showing up on wedding cakes, in signature cocktails, on chocolate bonbons — and the reason it keeps coming back is simple. That warm, blushy shimmer photographs beautifully, pairs with almost every color palette, and looks expensive without trying too hard.

Our Rose Gold Luster Dust Rose Gold Luster Dust is one of our most requested colors for weddings, and we’ve seen it used in ways that still catch us off guard. Here’s everything you need to make it work.

Why Rose Gold Works So Well for Weddings

It sits in this perfect middle ground between pink and gold. Warm enough to feel celebratory, soft enough to feel romantic. It doesn’t scream for attention the way a heavy metallic gold does — it just glows.

It also plays nicely with a lot of different palettes. Blush and ivory? Obviously. But it’s also great against deep burgundy, sage green, even navy. The warmth in the pigment keeps it from clashing. That’s not something every color can pull off.

And practically speaking — it photographs. Under warm event lighting, on a cake table, in a flute of prosecco, rose gold catches light in a way that shows up on camera without needing a filter. That matters now more than ever.

How to Use It


Pairing Rose Gold With Other Colors

Used alone, rose gold is quietly glamorous. But it layers well too.

Mix it with Pink Luster Dust for a softer, more romantic finish — great for bridal shower desserts where you want shimmer without anything too bold. The pink cools it down slightly and the result is almost iridescent on white chocolate or vanilla frosting.

Go the other direction and combine it with Gold Luster Dust for something warmer and more luxurious. Two-tone wedding cakes with alternating rose gold and gold tiers are everywhere right now. It works. The transition between them is natural because the pigments are complementary — no weird color clash.

One thing to avoid: mixing rose gold with cool-toned silvers or blues on the same surface. The warmth fights the cool tones and neither one reads the way you want it to. Keep warm with warm.

How Much Do You Need?

For a wedding, the honest answer depends on scale — but here’s a rough guide.

A 10g jar covers roughly 80–100 cocktails (at 1/8 tsp per drink), one two-tier cake with full shimmer coverage, or somewhere around 4–5 dozen truffles. If you’re doing all three for a large wedding, get two jars minimum. Running out of a color day-of is a nightmare that’s easy to avoid.

Our 50g jar is the better call for weddings with 100+ guests, or if you’re a baker doing multiple wedding orders in the same season. The per-gram cost drops significantly and you’re not anxious about running low mid-project.

Is It Actually Safe?

Yes. Every color in our lineup — including rose gold — is made with FDA compliant, food-grade mica pigments. Completely tasteless, odorless, vegan, and gluten-free. The same type of mica-based pigments have been used in food decoration for decades. You can eat it directly. It’s not just technically safe — it’s real food.

“Non-toxic” and “edible” are not the same thing, and a lot of glitter sold online is only one of those. Ours is both. If you’re sourcing edible glitter from somewhere else for a client’s wedding, check that the label specifically says FDA compliant — not just non-toxic.


Posted on Leave a comment

Edible Glitter Safety: FDA Rules Every Baker Should Know

Is edible glitter safe to eat? Gold and silver Luster Dust jars with pearlescent shimmer powder caught mid-air
Key Takeaways

• “Non-toxic” and “edible” are not the same thing — one means it won’t kill you, the other means it’s actual food
• Real edible glitter is made from FDA compliant mica-based pigments that have been used safely in food for decades
• A lot of glitter sold online as “edible” isn’t — check the label before it goes anywhere near food
• Ours is FDA compliant, vegan, gluten-free, and tasteless — full stop

Edible Glitter Safety: FDA Rules Every Baker Should Know

The short answer to “is edible glitter safe to eat” is yes — if it’s actually edible. That distinction matters more than people realize, and it’s where a lot of home bakers get tripped up. Not all glitter on the market is what it claims to be. Here’s how to tell the difference.

Non-Toxic ≠ Edible

This is the big one. “Non-toxic” means a product won’t cause acute harm if accidentally ingested. It does not mean it’s designed, tested, or approved for food use. A lot of craft glitters — the stuff sold at Michaels or floating around on Amazon — gets labeled “non-toxic” and that’s it. No FDA compliance. No food-grade ingredients. Just a craft product that technically won’t land you in the ER.

Edible is a different standard entirely. For a product to be genuinely edible, every ingredient has to be FDA compliant — either GRAS (Generally Recognized as Safe) or approved as a food additive. The ingredients have to hold up at that bar. “Non-toxic craft glitter” does not.

Put craft glitter on a cake? You’re feeding people something that was never intended to be eaten. It might be fine. It might not. Either way, you don’t actually know — and that’s the problem.

What Makes Edible Glitter Actually Safe

Real edible glitter is made from mica-based pearlescent pigments. Mica is a naturally occurring mineral that’s been used in food coloring for decades. It’s what gives products that shimmery, light-catching quality. The FDA has approved specific mica titanium dioxide pigments for use in food, and that’s exactly what goes into compliant luster dust.

Our Gold Luster Dust, Silver Luster Dust, and Pink Luster Dust — along with every other color we make — uses German mica pigments that are FDA compliant across the board. Vegan, gluten-free, no GMOs. Completely tasteless. The shimmer you see in the glass or on the cake? That’s it. Nothing else going on.

We wrote a more detailed breakdown of the actual ingredients in this post on edible glitter safety if you want to get into the specifics. But the short version: mica pigments, food-grade binders, nothing sketchy.

How to Read a Label (And What to Avoid)

Buying luster dust or edible glitter — whether from us or anyone else — here’s what to look for:

  • FDA compliant on the label. This is the language that matters. Not “food-safe,” not “non-toxic,” not “suitable for decorative use only.”
  • An actual ingredient list. If there isn’t one, that’s a flag.
  • No mention of “for decorative purposes only” — that phrase is a tell that the manufacturer knows it’s not actually food.
  • Vegan and gluten-free markers are a good sign, not because they’re required, but because they indicate the company is actually paying attention to what’s in the product.

The “for decorative purposes only” language is worth pausing on. Some brands put this on products they also market as edible. It’s legal cover — they can sell it near food products, use food-adjacent language, but that disclaimer means they’re not actually standing behind the safety of ingesting it. Don’t ignore that.

Is glitter edible? FDA-compliant luster dust label vs craft glitter marked non-toxic only, showing key labeling differences
Knowing whether glitter is edible starts with reading the label — here's exactly what to look for.

What the FDA Actually Says

The FDA regulates color additives in food pretty strictly. For a colorant to be used in food — including decorations that end up on food — it has to be either approved as a color additive or fall under the GRAS exemption. Mica-based pearlescent pigments used in food? Approved. Synthetic craft glitter made from polyester or metallic film? Not approved for food use, full stop.

There’s no gray area here. The FDA’s position is clear: if a product isn’t formulated with approved food-grade ingredients, it shouldn’t be going on or in anything people eat. The fact that a lot of non-compliant glitter exists in the market doesn’t change that.

The good news is that genuinely FDA compliant edible glitter — made properly, with the right pigments — has a long and clean safety record. The ingredients are well understood. You’re not doing anything risky. You’re just adding shimmer to your food, which is objectively a good decision.

Common Questions About Edible Glitter Safety


Bottom line: edible glitter is safe. Real edible glitter, made with FDA compliant ingredients, has been used in food for years without issue. The risk isn’t in the product category — it’s in buying something that isn’t actually what it claims to be. Know what’s in your glitter, check the label, and use it with confidence.