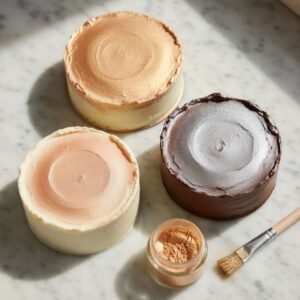
- Five application methods — dry dusting, wet painting, mixing into liquid, rolling, and airbrushing — each works better in specific situations
- Dry dusting is the fastest and hardest to mess up; wet painting gives you the most control
- How much you use matters. Too little and you lose the shimmer. Too much and it gets muddy.
- All five methods work with any of our colors — same dust, totally different results depending on how you apply it
Most people find luster dust and immediately ask: okay, but how do I actually use this? The short answer — you’ve got options. Five of them, really. And the method you choose changes everything: how intense the shimmer looks, how long it takes, and what kind of project it works on.
Here’s each one, straight. No fluff.
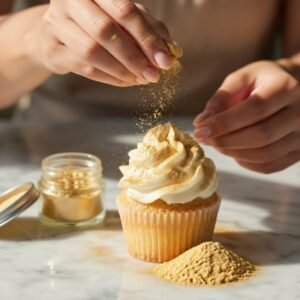
1. Dry Dusting
This is the starting point for basically everyone. Pick up a dry food-safe brush — a fluffy one works best — dip it lightly into the jar, and dust it directly onto your surface. That’s it.
Dry dusting works beautifully on fondant, gum paste, chocolate, and matte frostings. The shimmer stays on the surface, which means light hits it directly and the effect is maximum. Gold Luster Dust on fondant flowers is a classic for a reason — the dry application gives you that soft metallic glow that looks hand-painted even though it took about 30 seconds.
Two things to watch: tap the brush against the jar rim before applying so you’re not dropping a clump, and build up in thin layers rather than going heavy on the first pass. You can always add more. You can’t take it off.
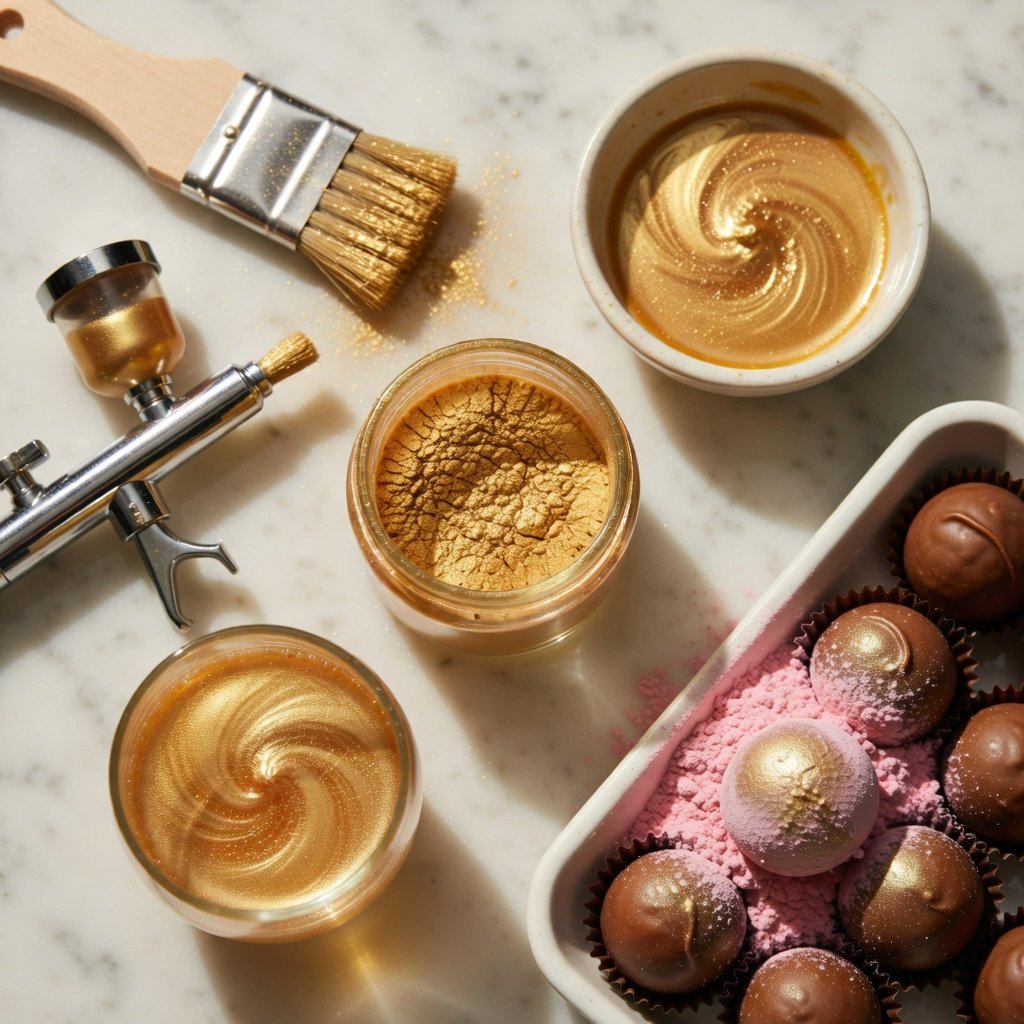
2. Wet Painting (Mixed with Alcohol)
Mix luster dust with a small amount of high-proof clear alcohol — vanilla extract, lemon extract, or vodka all work — and you’ve got a metallic paint. The alcohol evaporates fast and leaves the pigment behind in a clean, opaque finish.
This is how professional decorators get those fully gilded surfaces. A thin, even coat of Silver Luster Dust mixed with vodka on dark chocolate looks genuinely expensive — like something from a high-end patisserie. The ratio is roughly a pinch of dust to 4-5 drops of alcohol, mixed until you get a thin cream consistency. Too thick and it streaks; too thin and it takes forever to build up.
Flat-edged brushes give you clean coverage. Fine-tip brushes let you do detail work — lettering, veining on sugar flowers, highlighting specific edges. If you’re going for full cake coverage, start with the complete cake decorating guide before diving in — there are a few tricks that save a lot of time.
3. Mixing Directly into Liquid
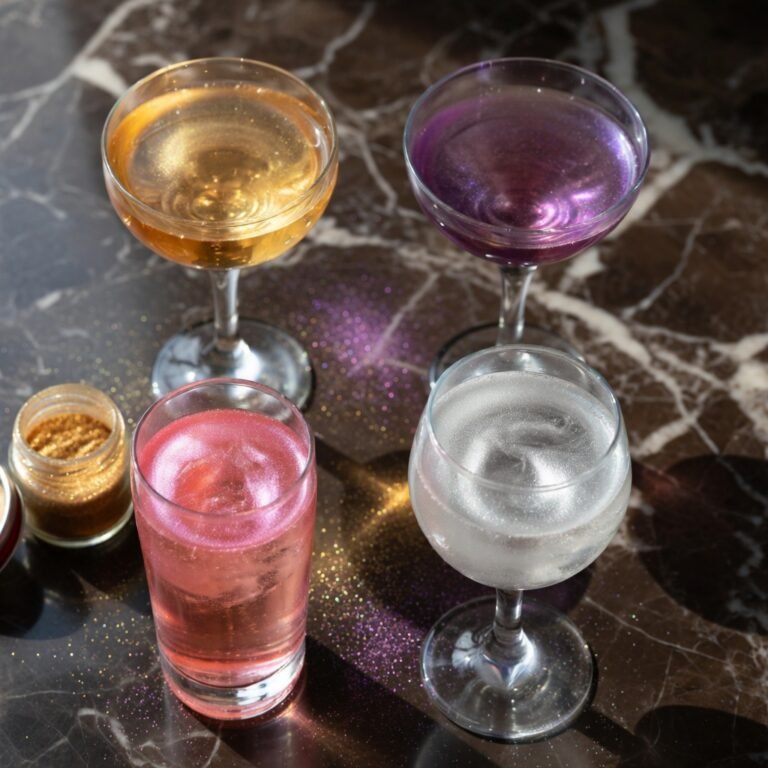
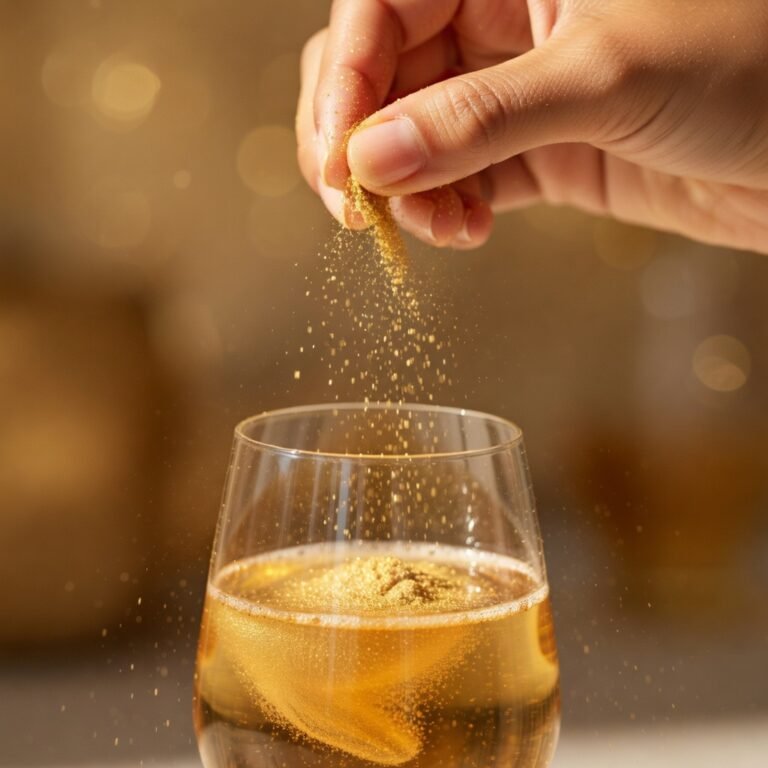
Drop a pinch into a drink, give it a swirl, and watch the shimmer move through the liquid as it settles. This is our most popular application by a wide margin, which makes sense — the visual effect in a glass is genuinely stunning and you need about 1/8 teaspoon per drink.
Works in champagne, cocktails, lemonade, hot drinks, you name it. The key is not overdoing it. More dust doesn’t mean more shimmer — it means the liquid looks murky instead of sparkly. Start small. You can always add a touch more.
You can do the same thing with whipped cream. A pinch of Pink Luster Dust folded into freshly whipped cream right before serving gives you this soft, iridescent topping that people genuinely can’t stop staring at. We have a full recipe for it — shimmer whipped cream topper — if you want specifics.
4. Rolling or Pressing
Pour a small pile of luster dust onto a plate or piece of parchment, then roll truffles, cake pops, or fruit directly through it. The dust sticks to anything slightly tacky — ganache, frosting, fresh fruit — with zero effort involved.
This method gives you full, even coverage that you genuinely can’t achieve with a brush. A dark chocolate truffle rolled in silver comes out looking almost chrome. Strawberries rolled in pink? Ridiculous. Drop them on a dessert board at a party and watch what happens.
The one thing to know: surfaces need some grip. A completely dry surface won’t pick up the dust evenly. If you’re working with something that’s dried out, a very light mist of water or a thin coat of corn syrup gives the dust something to hold onto.
5. Airbrushing
If you own a food-safe airbrush, luster dust is worth experimenting with. Mix it into your airbrush medium — or straight into clear alcohol — and you get smooth, gradient coverage over large surfaces with no brush marks anywhere.
This one’s not for beginners. The setup takes time, the cleaning takes time, and getting the mixture right (not too thick or it clogs) is a bit trial and error. But for wedding cakes or large tiered cakes where you need a perfectly even metallic sheen across the whole surface, nothing comes close. Start with a simpler method and work up to the airbrush once you know how the pigments behave.
Also worth knowing: not all luster dusts mix cleanly into airbrush medium. Ours do — the German mica pigments disperse evenly instead of clumping — but test a small amount before loading your sprayer for a big project.
Which Method Should You Use?
Quick shortcut if you’re deciding:
- Fast and easy: Dry dusting. Hardest to mess up, works on almost everything.
- Opaque metallic finish: Wet painting with alcohol. Full coverage, clean edges.
- Drinks or whipped cream: Mix directly in. 1/8 teaspoon, gentle swirl.
- Truffles, cake pops, fruit: Roll and press. Even coverage, zero effort.
- Large cake surfaces, no brush marks: Airbrush. Worth it for the right project.
None of these are complicated. A few minutes of practice and you’ll have a feel for whichever one you’re using. The dust is forgiving — and on most surfaces, if you go a little heavy, you can just add more and it layers without looking off.
Food-safe brushes are the only real requirement — don’t use craft store brushes that aren’t food-grade. Beyond that, a fluffy round brush covers large areas fast, a flat brush gives you more control on edges, and a fine-tip brush is for detail work. A basic set of food-safe decorating brushes covers all three.
You can mix it into frosting — it works especially well in buttercream for a shimmer swirl effect. Mixing into raw batter isn’t really worth it since most of the shimmer gets lost during baking. Better to apply after.
High-proof clear spirits work best — plain vodka is the easiest to find and gives clean results. Lemon extract or pure vanilla extract also work. Avoid anything with color or heavy flavor since you’re adding it to food.
In drinks: more than 1/4 teaspoon per glass and you’ll start losing the shimmer effect — it clouds up instead of sparkling. On surfaces: there’s more room to layer, but if you’re seeing thick deposits that look powdery rather than shimmery, you’ve gone past the point where it looks good. Thin layers always win.
You Might Also Like
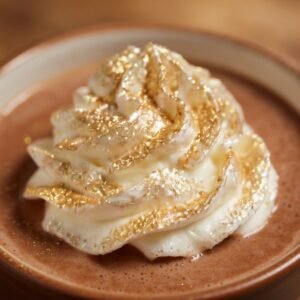
Shimmer Whipped Cream Topper
Pink luster dust folded into fresh whipped cream. Takes two minutes and looks incredible on literally everything.
How to Use Edible Glitter on Cakes, Cupcakes & Cookies
Full breakdown of techniques for baked goods — including wet painting tips for fondant and how to get even coverage on cookies.
Edible Luster Dust for Beginners: Your First Project Guide
Starting from scratch? This is where to start. Best first projects, common mistakes, and what to buy.