• Silver luster dust applied to white chocolate coating gives cake pops a polished metallic finish
• Dry-dusting (no liquid) is the move here — keeps the shimmer clean and bright
• White luster dust underneath the silver makes the color pop more than silver alone
• These take about 2 hours total including chill time — plan accordingly
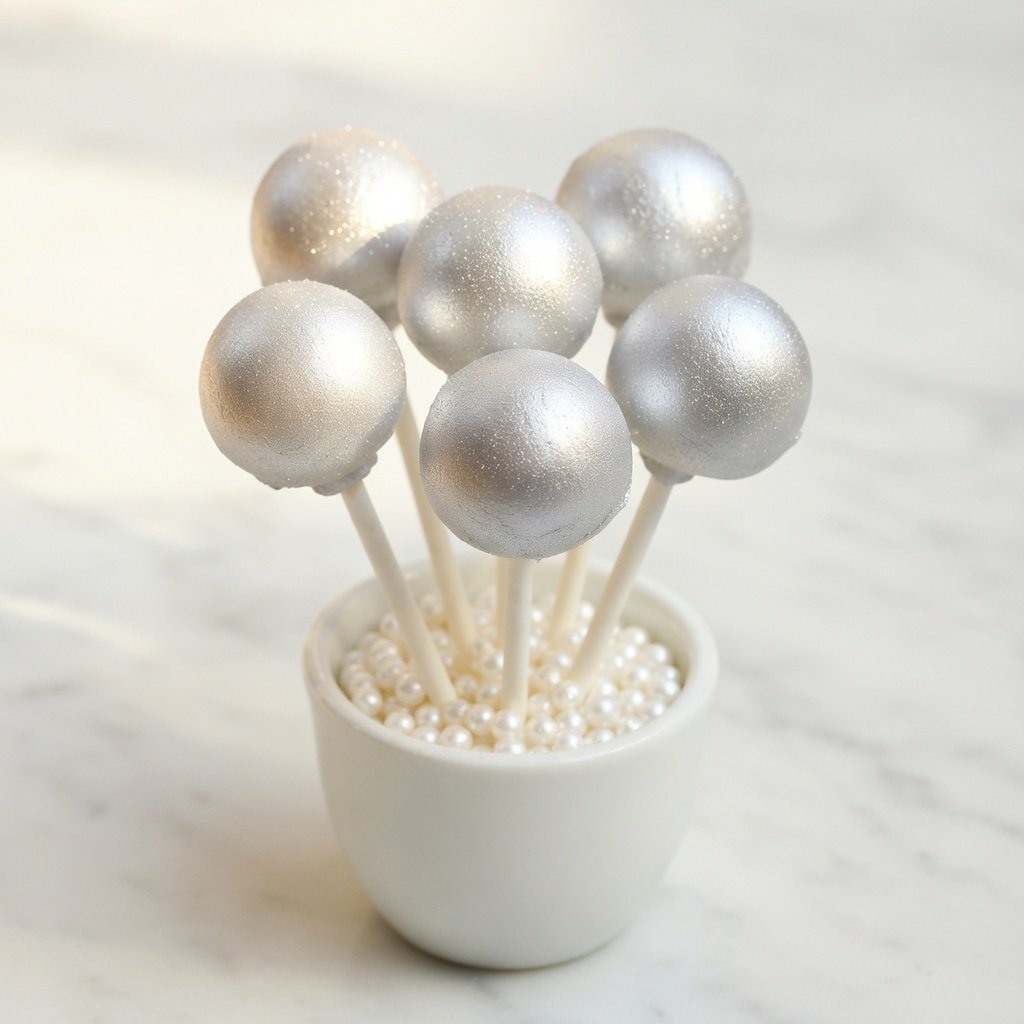
Silver cake pops that actually look metallic. Not sparkly. Not glittery. Genuinely silver — the kind that photographs like jewelry and makes guests do a double-take at the dessert table.
Ingredients
- 1 box Vanilla or white cake (baked and cooled)
- 1/3 cup Vanilla frosting (canned or homemade)
- 12 oz White chocolate candy melts
- 1 tbsp Coconut oil or shortening (for thinning chocolate)
- 24 Lollipop sticks
- 1/2 tsp Silver Luster Dust
- 1/4 tsp White Luster Dust
Crumble the cooled cake into fine crumbs — no big chunks. Mix in frosting one tablespoon at a time until the mixture holds its shape when pressed. You want it to feel like stiff cookie dough. Too much frosting and they’ll slide off the stick. Start conservative, add more only if needed.
Roll into balls about 1.25 inches across — roughly the size of a large marble. Place on a parchment-lined baking sheet. Refrigerate for at least 30 minutes. They need to be cold and firm before the sticks go in. Rushing this step is how you end up with cake pop casualties.
Melt a small amount of the candy melts. Dip the tip of each lollipop stick about half an inch into the melted chocolate, then push it straight into the center of a cake ball — about halfway through. The chocolate acts as glue. Let them set for 10 minutes before dipping.
Melt the remaining candy melts with the coconut oil, stirring until completely smooth. The coating should run off a spoon easily — if it’s thick and gloppy, add a little more oil. Dip each cake pop, let the excess drip off, then stand upright in a foam block or tall glass to set. White coating underneath is what makes the silver really land.
This is the part that matters most. Wait until the coating is completely dry — fully set, no tacky spots. Mix the Silver Luster Dust and White Luster Dust together in a small bowl. Using a soft, dry food-safe brush, pick up a small amount and apply in light, circular strokes. Build up coverage in two or three passes. Don’t glob it on — thin layers give you that smooth metallic finish. Thick applications look dusty.
Hold each finished pop up to the light and check for thin spots. A quick extra pass with the brush fixes any patches. For the full effect, arrange them in a vase or block so they’re upright — the silver catches light differently depending on the angle, and that’s exactly the look you’re going for.
—
If you want a warmer option for a mixed dessert table, Rose Gold Luster Dust applied the same way gives you a softer, blush-metallic finish that pairs beautifully next to the silver. We’ve done half-and-half trays for wedding showers and they always go fast.
New to working with luster dust? The beginner’s guide covers dry vs. wet application and which surfaces work best — worth a read before you start.
Two likely culprits: the coating wasn’t fully dry when you brushed, or you applied too much dust at once. Let the white chocolate set completely — give it a full 20 minutes at room temperature or 10 minutes in the fridge. Then apply the silver in thin layers, building up gradually. Patience is the whole technique here.
You can, but you won’t get the same finish. Mixing edible silver glitter into the coating gives you a shimmer-throughout effect, which looks pretty but reads more sparkly than metallic. The dry brush application on the surface is what creates that polished, mirror-like look. For wedding cake pops specifically, go with the dry method.
Cake pops keep well for 3-4 days at room temperature in an airtight container, or up to a week refrigerated. Apply the luster dust after the final chill — refrigerator condensation can affect the finish if you dust too early and then refrigerate again. Make the pops in advance, store them, dust right before the event.
You Might Also Like

Silver Shimmer Margarita
Silver in a cocktail glass hits differently. Same metallic effect, different occasion.

Glitter Rimmed Cocktail Glasses
A matching detail for the bar at the same event — five minutes of work.

Rose Gold Prosecco Spritz
If you're doing rose gold cake pops instead, this is the obvious drink to pair them with.